Tuesday, September 30, 2008

Taste of Home: Char Siew


One of my favourite foods growing up was a hawker-style dish called "char siew, wonton" noodles. "Char siew" is of course barbecue pork, and wonton is... well, wonton. I would sometimes get another kind of dumpling called "Sui Kao" which is a larger version of a pork and shrimp wonton. I could eat the noodles for breakfast every weekend and still not get bored. Despite the fact that there were tons of wonton noodle stalls scattered around the places I frequented, it was really hard to find a stall that served a good plate of "char siew wonton". Most of them either served egg noodles that had a strong alkaline taste or wonton that were so small it resembled rubber bullets.

I recently found this recipe online, and decided to try making my very own "char siew wonton" noodles. Since I've been so busy lately, I made my own "char siew" but used some store bought dumplings that resembled "Sui Kao".


The perfect kind pork for this recipe will either be pork tenderloins with some marbling. If you like fatty pork (most Chinese people do!), you can use pork belly. Instead of the glaze from the recipe, I added honey to the cooked pork, sliced them and grilled it on my trusty George Foreman until there was a nice caramelized layer on the pork.

The "char siew" was just sweet enough, the marinade was absolutely spot on and the barbecued pork turned out remarkably stunning. I served it with the Trader Joes' pork dumpling in a light chicken broth, some egg noodles tossed with sweet soy sauce and a teensy bit of oil, and some blanched baby bok choy.

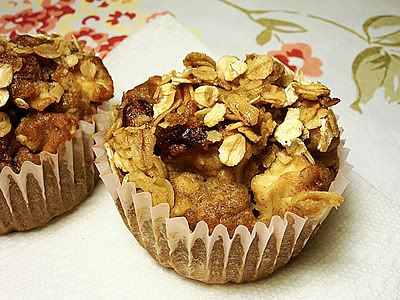
Behold it's Fall: Cranberry and Apple Muffins


I've just realized that the last time I updated this blog was a week ago. Since starting school again for my PhD program, I haven't been able to do much cooking and have resorted to easy meals (like salmon steaks) that I chuck on the grill. I'm lucky though, to be living with someone who isn't as fussy about food, and who makes good Phad Kee Mao for those days when all I want to do sit in front of the TV and not move.

One of the terrible things (the are uncountably many of them) about having to attend lectures in the morning is that if I have several classes in a row, I get insanely hungry and sleepy. I find that munching on something along with a thermos-full of coffee usually helps. I guess that explains why when I was taking more classes two years ago, I was much chunkier.

Muffins are the best things to bring with you and works for a lunchtime dessert as well. You can leave the muffins at room temperature for 3 days, and freeze the rest for up to two weeks. But I'm pretty sure it will all be gone by then. As fall is now officially on its way, I've decided to use some lovely Washington-grown Gala apples for a batch of muffins.

Cranberry and Apple Muffins
Makes 15 muffins

3/4 cup whole wheat flour
1/2 cup unbleached all purpose flour
3/4 cup old-fashioned oats
3/4 cup light brown sugar
1 tbsp grated orange peel
1 tbsp ground flax seed
1 tsp allspice
2 tsp grated nutmeg
4 tsp ground cinnamon
1/4 cup canola oil
1 egg, beaten
1 cup applesauce
3/4 cup soy milk/skim milk
1 tsp lemon juice
1 tsp pure vanilla extract
1 large gala apple, peeled and chopped into 1/2 inch cubes
3/4 cup sweetened dried cranberries

Oat streusel (optional)
1/2 cup old-fashioned oats
1/4 cup light brown sugar
4 tbsp butter or margarine

Cut the butter into the oats and sugar using a pastry blender until the mixture resembles coarse crumbles.

Preheat oven to 425°F.

In a food processor, pulse 1/2 cup oats for 10 times.

Combine processed oats, flour, sugar and spices together in a large bowl. Make a well in the center and pour in beaten egg, applesauce, canola oil, milk, lemon juice, vanilla extract and orange peel. Stir gently for about 6 -7 times with a large spatula.

Add in cranberries and chopped apples. Stir again until all the ingredients are just combined, about 15 stirs. Be careful not to over mix batter. Spoon into lined muffin tins until it almost reaches the top of the mold. Sprinkle the oat-butter-sugar mixture on top.

Bake muffins at 425°F for 5 minutes then turn heat down to 395°F for about 20minutes until a knife or skewer inserted in the middle comes out clean. Remove muffin tins from oven and set over a wire rack for about 10 minutes. Turn the muffins out and cool completely on wire rack.

Tuesday, September 23, 2008

Italian Food on a Budget


Italian food is possibly one of the easiest and quickest and possibly cheapest cuisine to make at home. It's usually not worth the price to eat out when all you need usually are some good diced tomatoes, a jar of tomato paste and some herbs and good quality olive oil. Some special store-bought gourmet pasta would also work well when you're trying to have a quick and elegant meal. I usually make enough cacciatore to last for both dinner and packed lunch the next day. It's super easy to make, saves a ton of money and tastes as good today as it does tomorrow.

You can pack leftover cacciatore in a microwave proof container along with some fresh bread and a cold cucumber salad for a satisfying lunch. A Bianco Sicilia complements the meal nicely.


Creamy Chicken Cacciatore with Olives and Basil
Serves 4

2 boneless and skinless chicken breasts
1 medium white onion, diced
4 cloves garlic, minced
2 cans of 16oz. diced plum tomatoes, drained
1 jar 4 oz. tomato paste
1/4 cup dry sherry or vermouth or white wine
1/4 cup ricotta cheese or cream cheese
1/2 cup Gaeta or Kalamata olives, sliced in half
1 cup packed fresh basil leaves
Freshly ground black pepper
Kosher salt

Butterfly the chicken breast and cut into half to yield eight pieces. Season with salt and pepper.

Heat one tablespoon olive oil in a skillet. Sear the chicken until cooked through, 4 minutes on each side. Set aside on a baking dish.

Set oven at 375°F.

In the same skillet, add one teaspoon of olive oil and saute onions and garlic until onions turn transluscent. Add in vermouth (or sherry) to deglaze the pan. Toss in the drained tomatoes and turn heat down to medium. Add in tomato paste and stir to combine. Allow the tomato mixture to simmer for 5 minutes. Stir in cheese and turn heat off.

Add sliced olives to the chicken in the baking dish. Pour in tomato mixture and scatter torn basil leaves on top. Bake the chicken for 15 minutes in the oven. Serve with rotelli pasta and a large side of salad.

Sunday, September 21, 2008

Weekly Meal Roundup

I thought I'd try summarizing my dinner menu for the past week mostly to gauge how healthy I've been eating, and also just for your benefit, if you're looking to plan ahead at some point.

Monday: Fajitas at Azteca Mexican Restaurant
Tuesday: Easy Tandoori Chicken, Sambhar and Rice
Wednesday: Phad Thai
Thursday: Potato and Mustard Greens Soup
Friday: Goat cheese, tomatoes and thyme Tart
Saturday: Chorizo, Chicken and Seafood Paella
Sunday: Leftover paella with Hot German Potato Salad and Mixed Greens

A Panini for Sunday Breakfast


I love Sundays mostly because it's the only day of the week I don't feel overwhelmed to roll quickly out of bed, storm to the bathroom and sulk while brushing my teeth. Sundays are usually lazy, I lie in bed thinking about the sweet aroma of coffee, deciding whether to have a sweet breakfast (pancakes! waffles! muffins!) or savoury breakfast (eggs! bacon! sandwich!).

Fresh ciabatta bread took over the mind today, and I decided to wake up and whip together some lovely panini. We've contemplated getting a panini press, which we might at some point later in the year, but for now, our trusty, wussy old George Foreman grill works well for getting our paninis hot and crusty.


One of the ingredients I used in the panini was a bottle of hot peppers we picked up from Potbelly sandwich shop in Chicago. It's a combination of pickled jalapenos, bell peppers, carrots, cucumbers, celery and cauliflower which lends a subtle spicy taste to kick up the panini.

Honey Smoked Ham Panini with Caramelized Onions and Provolone
Serves 2

1 loaf fresh ciabatta bread, halved and sliced in the middle
8 slices deli honey smoked ham (we used Hormel Natural Choice ham)
4 tbsp caramelized onions (recipe below)
2 tbsp hot peppers (jarred jalapenos would work)
1 tsp fresh rosemary, chopped
2 slices provolone cheese
Dijon mustard
Mayonnaise
Sliced tomatoes and lettuce leaves

Spread a thin layer of mayonnaise on one side of the ciabatta. Layer with 4 slices of ham and top with caramelized onions and hot peppers and provolone. Sprinkle some fresh rosemary on top. On the other side of bread, spread a thin layer of mustard and sandwich the bread together. Grill on a panini press until the cheese is melted, about 4 minutes on each side.

Caramelized Onions
1 onion, sliced thinly into rings
1 tbsp brown sugar
1/4 cup dry vermouth or sherry

In a stainless steel skillet, heat one tablespoon olive oil. When the pan starts to smoke, add in the onions and turn the heat down to low. Gently saute the onions until they turn transluscent and start to brown, about 8 minutes. Add in brown sugar and saute for another 6-7 minutes. Gently add in vermouth and turn up heat, simmering until all the vermouth is absorbed and the onions are soft and brown.

Saturday, September 20, 2008

It's Paella Night!


Ugh, the non-stop rain is already starting. I sometimes really can't stand the sound of constant dripping, it reminds me that I'm getting old and my chubby fingers hurt when I'm slicing tomatoes. The trick to overcoming dreary weather phobia is to imagine that I'm in some sunny country where the air smells of the ocean and the food is reminisce of the warm, salty air. What better place to offset the Seattle gloom than Spain!

I love Mediterranean cuisine, everything from Moroccan chicken to Turkish kebabs to Sardinian pasta. But of course, no list of Mediterranean cuisine is complete without the mention of paella. I've read countless cookbooks on making the perfect paella, and it just seems to me that paella are relatively subjective. You have the Valencian paella which have inland ingredients such as rabbit and duck while the Andalucian paella tend to have seafood. Apparently in Spain, a combination of seafood and meat paella would be faux pas (with the exception of chorizo to add taste and colour).


I've made paella twice in my life, both times in which I have never used a paella pan. I don't think it's particularly necessary if you don't make paella habitually. A large stainless steel frying pan would suffice. I don't remember where this recipe comes from, but it's a tried and tested method that I love although it's not traditionally 'Spanish'. It combines chorizo, chicken and seafood - a faux pas, but a tasty faux pas no less.

We paired this with some wonderful homemade sangria to complete the Spanish experience. Sadly, the night was ruined with some minorly buzzed watching of Sex in the City, The Movie. It was so bloody awful, even a whole bottle of Rioja and extra brandy in the sangria wasn't enough to numb the pain.

Chorizo, chicken and seafood paella
Serves 4

8 oz. chicken thighs
6 mussels, debearded and scrubbed
6 tiger or jumbo prawns, peeled with tails left on
6 oz. red snapper or cod
1 Spanish chorizo link, sliced
1 can diced tomatoes, drained
1 medium white Spanish onion
1 cup Spanish Bomba rice (substitute with Italian Arborio)
2 tsp Spanish roasted paprika
1 tsp Spanish saffron threads (crushed)
2 cups chicken broth
1 cup water
1 cup frozen green peas, thawed
Handful chopped fresh parsley
Freshly ground black pepper and salt to taste

Cut the chicken thighs and snapper into bite size pieces.

Season the chicken all over with paprika and set aside. Mix the chicken broth and water in a saucepan and set over medium heat to keep hot.

Heat a large shallow skillet or paella pan with 1 tbsp olive oil. Saute the chicken and chorizo until cook through and the oil in the pan turns red. Set aside on a plate.

In the same pan heat an additional 1 tbsp olive oil and add in the garlic, onions, tomatoes and remaining paprika. Season with salt and pepper. Saute until the onions turn brown and fragrant. Add in rice and stir to coat. Add in saffron and gently coat rice again.

Turn up the heat to high and pour in the chicken broth mixture. Make sure the broth is bubbling. Shake the pan slightly to ensure even heat and that the rice is completely immersed in the broth.

Turn heat to medium and simmer gently for about 15 minutes. Add in seafood, cooked chicken and chorizo. Give all the ingredients one good stir to tuck in the seafood. Simmer the paella for another 10 minutes until the prawns turn pink and the mussels open up. Turn the heat up to medium-high and scatter the peas on top. At this point, there should be no remaining visible liquid in your pan.

Wait 5 minutes and turn the heat off. Scatter chopped parsley on top and let rest on hot stove for about 10 minutes before serving. Garnish with lemon wedges.

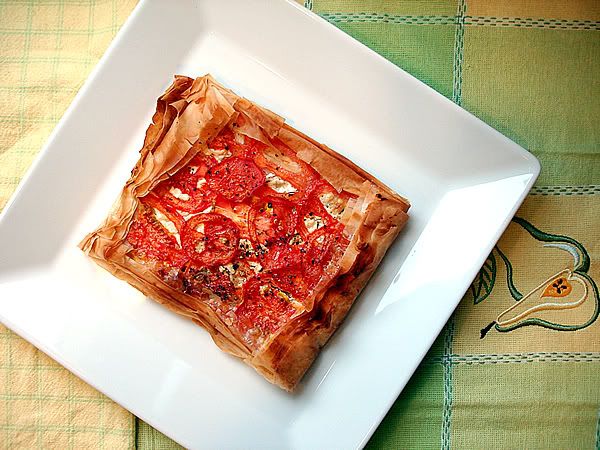
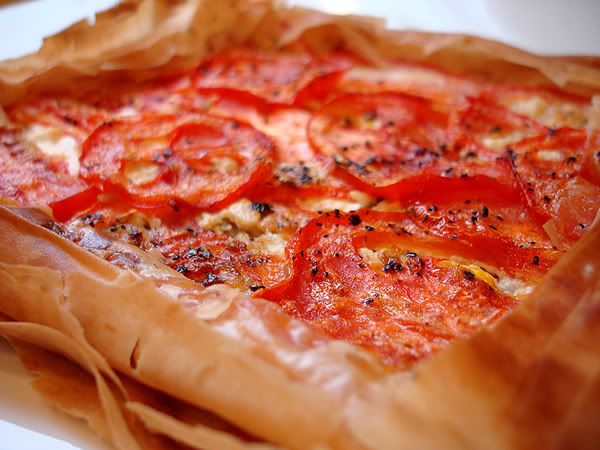
Goat Cheese, Thyme and Tomato Tart


The boyfriend and I have this pact where we try to have alone time every once in a while. My "alone time" usually consists of staying home, watching a movie or reading a book and making an individual meal. I've been meaning to try making a tart for a long time but seeing as I have no tart pan, I thought I'd just try something extremely simple following Delia Smith (I love Delia!)'s recipe for Goat Cheese, Thyme and Tomato Tart. I didn't have any puff pastry on hand so I used some phyllo dough which was leftover from an apple strudel a while back.


It takes only 30 minutes to bake, and you can sit back and enjoy it with a glass of wine and a side of salad.

Goat Cheese, Thyme and Tomato Tart
Make 1 individual serving

4 pieces phyllo dough
2 roma tomatoes, sliced very thinly
3 oz goat cheese, softened at room temperature
1 tsp dried thyme
2 tsp extra virgin olive oil
Olive oil spray
Sea salt and pepper to taste

In a small bowl, mix together goat cheese, thyme and milled black pepper. Slice the tomatoes thinly and sprinkle with sea salt.

Unroll each phyllo dough layer onto a work surface and spray with the olive oil spray. Fold the layer into half. Repeat for the remaining 3 layers and stack them on top of each other to yield 8 layers of pastry.

Spread the goat cheese mixture onto the prepared pastry, leaving 1-inch strips free on all sides. Layer the cheese on the goat cheese lengthwise on the prepared pastry. Top of with more freshly ground black pepper.

Bake at 325°F for 30 minutes until pastry is golden brown and the tomatoes are roasted.

Friday, September 19, 2008

Orange and Cranberry Banana Bread


I never understand how people can voluntarily get out of bed at 6.30 in the morning, prepare breakfast and coffee and bounce to work. I have to be practically dragged out of bed and beaten with a stick before I eventually crawl out of bed and sulk at the bathroom mirror. But anyway, my point is that most days I like thinking about breakfast the night before (yes, dreams of cake and muffins and all sweet goodness). In that way, all I have to do in the mornings is brew some coffee and cut a slice of **insert baked good here**.

This recipe is a take on the old fashion banana bread which I've spruced up with some cranberries and orange peel (I feel inclined to preach the message of Microplanes, but I won't). Banana breads in general tend to be a little too sweet for my liking, so for this recipe I used less sugar. If the bread turns out to be a little bland for you, you can always serve it with some honey or maple syrup. Minimal oil was also used in the recipe as both mashed bananas and applesauce gives the bread a soft, moist texture.

Orange and Cranberry Banana Bread
3/4 cup whole wheat flour
1/2 cup unbleached all-purpose flour
3/4 cup brown sugar
2 tsp orange peel
1.5 tsp baking powder
2 large eggs
1/2 cup applesauce
1.5 cup mashed bananas (about 3 bananas)
2 tbsp canola oil
1/2 tsp pure vanilla extract
3/4 cup sweetened dried cranberries
1 tbsp rum (optional)
2 tbsp milled flaxseed (optional)

Preheat the oven to 350°F.

In a small bowl, whisk eggs, rum and vanilla extract. Mix flour, sugar, orange peel and baking powder in a medium bowl. Make a well in the center and pour in the egg mixture, applesauce and canola oil.

Add in the mashed bananas and cranberries. Mix all the ingredients until just moist.

Lightly rub a 9x5in loaf pan with butter or non-stick spray. Pour in the mixture, scatter milled flaxseed on top and bake in preheated oven for 45 - 50 minutes until a skewer inserted in the middle of the loaf comes out clean.

Wednesday, September 17, 2008

Candied-Ginger Cookies


I don't know about you, more often than not, I run into a recipe that I really want to try, buy all the ingredients, but never end up actually making it. I tend to veer off course in search of something else that takes my fancy (and sometimes not related at all to cooking). I initially bought some candied ginger from Trader Joes for a biscotti recipe but ended up making some ginger cookies instead.

This recipe is from marthastewart.com's Ginger Cookies with Lemon Glaze. I found that the cookie itself was already tremendously sweet, therefore adding the glaze would be sugar overkill. I made some tweaks to the recipe, leaving out the lemon glaze but still having some lemon zest in the recipe and using Nucoa margarine (for dairy-free goodness) in place of butter.

Instead of refrigerating the dough for an hour, I tossed it in the freezer for 20 minutes to achieve a tougher consistency. Finally, one last tweak to the original recipe that I made was that I did the drop cookie method (rolling the dough and flattening with the back of my hand) instead of using a cookie cutter - I thought the dough was rather too soft and sticky to use a cookie cutter. All in all, the cookies were incredible, and I'm not even a big fan of cookies!

Candied-Ginger Cookies
2 cups all-purpose flour, plus more for surface
1/2 teaspoon baking powder
Salt (omit if using salted butter)
6 ounces (3/4 cup) unsalted butter or margarine, softened
1 cup packed light-brown sugar
1/2 cup finely chopped candied ginger
1 large egg
2 tablespoons pure vanilla extract
2 tablespoons finely grated lemon zest

Sift flour, baking powder, and 3/4 teaspoon salt into a bowl. Cream butter and brown sugar with a mixer on medium speed until pale and fluffy, about 3 minutes. Add ginger, and beat for 2 minutes. Beat in egg and vanilla until well combined. Add flour mixture, and then beat on medium-low speed until dough just comes together.

Shape dough into two 1-inch-thick disks. Wrap tightly in plastic, and place in freezer for 20 minutes.

Preheat oven to 350 degrees. Turn dough onto a lightly floured surface and roll into 1-inch balls. Place on parchment-lined cookie sheet and flatten with the palm of your hand until it becomes 2-inch disks of 1/4 inch thickness.

Bake, rotating sheets halfway through, until cookies are set and edges are light gold, 10 to 12 minutes. Transfer parchment with cookies to wire racks. Let cool completely. Repeat with remaining dough. (Cookies can be stored for up to 3 days.)

Tuesday, September 16, 2008

Easy Tandoori Chicken


Recently I've been quite out of touch with cooking, mostly because I've been getting lazy, soaking in what's left of summer and trying to keep healthy. One person I constantly "unleash" all my cookies and cakes on is Shrad, my Indian colleague at work. He's an excellent cook who opened a whole new realm of Indian cooking possibilities for me, and who makes quite a variety of delicious Indian food, although now he has become rather pretentious and only makes Italian food.


Shrad made me some wonderful sambhar today, which is a South Indian vegetable stew - sort of like the Indian ratatouille. Using fresh green chilis, he made the sambhar both spicy and incredibly delicious served with rice. The boyfriend, however, is one of those carnivores that need meat with every meal. So I rounded off dinner with a quick and easy tandoori chicken - marinating for only 15 minutes, and broiling the chicken. Tandoori in stores are usually red in colour because of food colouring (FC#265 etc.), and I've omitted that to yield a yellowish-tint tandoori.

Easy Tandoori Chicken
Makes 4 servings
4 chicken drumsticks
6 oz chicken breast (sliced into bite size)

1/2 cup plain low-fat yogurt (you can also use unsweetened plain soy yogurt)
1 tbsp garam masala
4 tbsp ground paprika
2 tsp ground black pepper
2 tsp kosher salt
2 tbsp lemon juice

Marinate chicken in tandoori mix for at least 15 minutes. Bake in a glass dish at 450°F for 20 minutes, turning once until chicken is cooked through. Transfer chicken to broiler pan and broil on high for 15 minutes until juices are almost dried and the outside of the chicken meat is blackened and crispy.

Saturday, September 13, 2008

The Barbecue

There's nothing like relaxing with friends and having some hamburgers on the grill.


The food list included:
Burgers and bun
Potato Salad
Smashed Potatoes
Mixed Salad
Coconut and Pineapple Tart
Brownies
Apple Pie
Lots and lots of alcohol

Friday, September 12, 2008

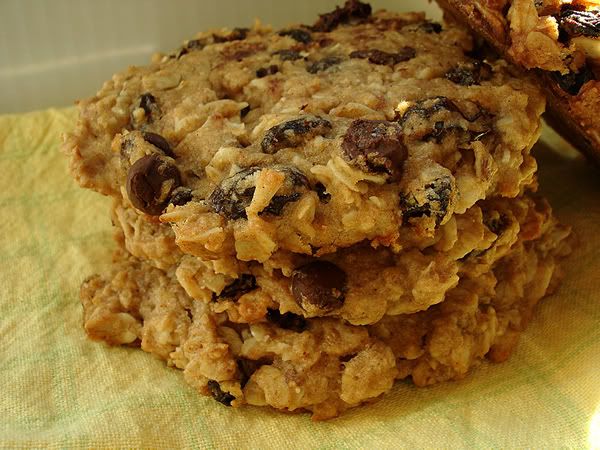
Dairy-free Chewy Oatmeal Raisin and Chocolate Chunk Cookies


I usually, on most days, try to steer clear of cookies. I recently bought a pack of coconut macaroons to use in a pineapple tart recipe, and found myself munching away on almost half the packet - two cookies = 170 cals, which is just really disasterous if you're on a diet or if you're trying hard (like me) not to look like an inverted mushroom.

Having the macaroons reminded me of how much I really like cookies, and why most cookies are really bad for you. A compromise had to be reached - I would make a cookie that could serve as a meal and to offset the cookie urge.

This oatmeal raisin cookie recipe uses no butter or eggs, and relies solely on applesauce and canola oil to keep it moist and chewy. I added chocolate chunks to give off a sense of "decadence" but really, I think these cookies are almost as good as an energy boost as Clif or Luna bars. I'm not a huge fan of vegan baking, but every once in a while, these things really are yumtastic and healthy! Unfortunately, because the cookies are vegan, they won't keep as well, so it's best eaten on the day you bake them and no more than two days later.

Dairy-free Chewy Oatmeal Raisin and Chocolate Chunk Cookies
Makes 10 jumbo sized cookies

2 cups old fashioned oats
1/2 cup whole-wheat flour
1/2 cup unbleached all-purpose flour
1/4 cup dark brown sugar
2 tbsp honey
1 tsp baking powder
1/2 tsp salt
1/2 tsp ground nutmeg
1/2 tsp ground cinnamon
1 tsp pure vanilla extract
1 cup applesauce
1/2 cup canola oil
1/2 cup Thomson raisins
1/2 cup dark chocolate chunks (dark chocolate bar broken into pieces)

Preheat oven to 350°F.

Mix all ingredients in a large bowl, cutting through with a spatula until the dough is moist.

Line a cookie sheet with parchment paper and ladle 1/4 cup of batter on to parchment sheet. Press down to about 1/2 inch thick, and 5 inches in diameter. Bake cookies for about 20 mins until the edges are browned but the center is still soft. Cool on cookie sheet for about 10 mins before transferring to wire racks to cool thoroughly for about 30mins.

Note: If you make smaller cookies, 10mins in the oven will do

Wednesday, September 10, 2008

Easy Chorizo, Arugula and Goat Cheese Pizza


My post yesterday was about the wonderful flatbread recipe found on smittenkitchen which I made over the weekend. The flatbread was so good I knew that at some point during this week, I would have to make it again. Combine that with an uncanny urge for pizza, I had to experiment with making some flatbread pizza.

The result is a super easy, entirely homemade pizza that take about 1/2 an hour to conjure, including cook time! It's wonderful for one of those hectic weekdays. Of course you can use ready-made Greek pita flatbread as the crust but I think this measures up equally well in terms of cooking speed and ease.

I used sliced chorizo (you can sense a theme on this blog: chorizo is my blood vein), some arugula and goat cheese to top off a basil-infused flatbread crust. Served with some sort of cheap Crianza wine makes for a good meal.

Easy Chorizo, Arugula and Goat Cheese Pizza
Serves 1 (about 2 pizza slices)

1/3 recipe for flatbread
Substitute chopped basil for the rosemary

1/2 link of chorizo
2 tbsp crumbled goat cheese
1/2 cup baby arugula
Black Pepper

Roll out the flatbread into a rough circular shape. Try not to roll it out too thinly, about 1/2 inch in thickness.

Brush the flatbread liberally with olive oil, layer toppings (chorizo first, then the arugula and top off with goat cheese), and grind fresh black pepper over the pizza. The chorizo will be salty enough, so there is no need to sprinkle salt over the pizza.

Bake at 450°F for about 15 mins until chorizo is cooked through.

Monday, September 8, 2008

Big Bowl Chili and Parsley Flatbread


The past weekend was the start of football season, well I think. I don't follow the game, I just use it as a random excuse to cook some classic American food and pretend that I'm inhaling the culture. Part of the culture inhalation was to try my hand at making chili (which I've never done before). Anyone who knows me, knows that I dislike beans with a passion. But the thought of making Texas-style chili just seemed overwhelming, what with the meat and complete lack of other kind of vegetables it just felt like I would be merely making... pasta sauce.

I found some really nifty ideas online for a low-fat turkey and black bean chili. Again, anyone who knows me knows I hate beans with a passion. So if a recipe was going to demand beans, it had better be pretty darn good. Turns out, the chili was absolutely yumtastic; I actually had second helpings. The corn and tomato sauce evened out the flavour of the beans and made it so much more bearable (and also because I sekritly picked out the beans from my bowl). I call it the Big Bowl Chili because I used some Big Chili Bowls I bought from Crate and Barrel. It's only fitting.

The best thing that went with the chili was of course some flatbread. Deb of smittenkitchen, where this flatbread recipe came from, has a really uncanny knack of finding easy and super delicious recipes. While she used rosemary, I thought that wouldn't be a good pairing with chili, so I substituted the rosemary with some parsley.

We rounded off the meal with some ice tea infused with vodka and berries for a perfect game season meal. I'm including only the recipe for the chili, you can head over to smittenkitchen for the flatbread recipe.

You can top off the chili with cheese, but I went heart-healthy with this one.

Big Bowl Chili
Serves 4

8 oz. ground turkey
1 medium sweet onion, chopped
2 cloves garlic, minced
1 can (15 oz) diced tomatoes, no salt
1 can (15 oz) tomato sauce
1 can (15 oz)black beans in water
1 cup frozen sweet corn kernels
3 heap tablespoon chili powder
1/2 tbsp ground cumin
1/2 tbsp ground coriander
1/4 tbsp ground black pepper
Salt to taste
Sour Cream (optional)
Shredded cheddar or 4 cheese Mexican mix (optional)

Heat 1 tbsp extra light olive oil or vegetable oil in a soup pot or dutch oven. Saute onions and garlic until fragrant and soft. Add in turkey and saute until turkey is no longer pink. Add in tomatoes, tomato sauce, kidney beans, corn kernels and spices. Simmer for about 20 minutes, uncovered. Add in salt to taste and simmer for 10 minutes covered. Turn off heat and let the chili steep for as long as possible, allowing the chili/tomato compote to steep will help seal in the flavours.

To serve, spoon in bowls and top off with a dollop of sour cream and scatter some shredded cheese.

Sunday, September 7, 2008

Marmalade and Raisin Coffee Cake


The past couple of days have been regretfully hectic, and since the end of my defense two days, I've been eating out and sleeping in, letting my body catch a momentary whiff of calm and peace. I spent most of yesterday traipsing Post Alley in downtown Seattle to look for more nuts and herbs and mugs at World Market and Sur La Table. Yes, people know me there. I've also been particularly unmotivated with my culinary escapades mostly because my true nature has set in - I'm as lazy as a goat.

This coffee cake makes for a wonderful Sunday morning breakfast, paired with some hot coffee or tea infused with orange slices, a pat of butter and some fresh fruits. I want to say it's quite like fruitcake for the lazy, but I won't. I used Seville Orange marmalade which I picked up at Safeway for a sudden want of marmalade goodness. It was surprisingly good, and I am a self-proclaimed marmalade fanatic. Marmalade made from Seville oranges are slightly more bitter than the regular "orange jam", but apparently this is the way real Scottish marmalade tastes and I rather quite like it, thank you sirree. Combining the jam with raisins and icing sugar help even out the bitterness. If you don't like marmalade (I'm sorry we can't be friends!), you can always use regular low sugar orange jam.

Marmalade and Raisin Coffee Cake

1 cup unbleached all purpose flour
1 cup whole wheat flour
3 tsp baking powder
2 tsp grated lemon peel
1 cup soy or skim milk
2 eggs, beaten
2 tsp vanilla essence
1/4 tsp grated nutmeg
3 tbsp margarine
1/4 cup vegetable oil
3 tbsp marmalade
3/4 cup raisins
1 tbsp powdered sugar

Preheat oven to 350°F.

In a smaller bowl, combine the beaten egg, vanilla, milk and vegetable oil.

In a large bowl mix together dry ingredients, lemon peel and nutmeg. Make a well in the center and gently pour in the egg mixture. Stir with a spatula until just combined.

Cut in the margarine, and add in the raisin. Stir gently. It doesn't matter if the margarine is still lumpy.

Pour half the batter in a 9in. x 5in. loaf pan. Spread the marmalade on top using your spatula. Top off with the remaining batter.

Bake in oven for about 45 - 50 mins until skewer inserted in the middle of the cake comes out clean. Cool on wire rack, sprinkle with sieved powdered sugar and slice with serrated knife.

Wednesday, September 3, 2008

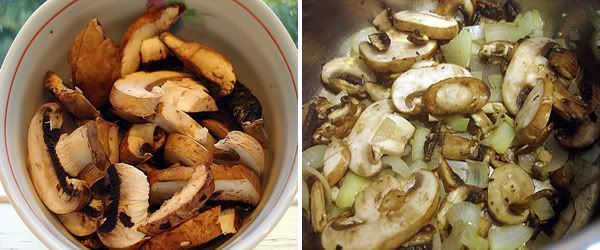
Chunky Mushroom Soup


For a couple of weeks now I've been eyeing some mushroom soup recipes. I love mushrooms so much I can probably have them everyday. One of my favourite mushroomy meals of all time is spinach and mushroom frittata which goes wonderfully with a cup of coffee on Saturday mornings.

I bought some fresh foccacia at the grocery store today and immediately wanted to head home, have some soup and bread, a glass of wine and work on my defense. In that vein, the soup had to be easy, quick and filling too. So in came the mushroom soup idea. There are tons of really great recipes out there, so I just fused a few and made my own using the herbs I know best. It turned out that the soup was really light - I used a teensy bit of corn flour and skim milk instead of heavy cream to make the soup thick and I think being able to chew on mushroom bits and biting into a piece of foccacia layered with cream cheese whilst sipping a glass of Chardonnay helped with bringing out the wonderful flavour of this soup. You can make the recipe vegan by using soy milk instead of skim milk.

Chunky Mushroom Soup
Serves 4, about 1 cup each

2 cups sliced crimini mushrooms
2 tsp butter
1 tsp olive oil
2 cups low sodium chicken or vegetable broth
1 medium sweet onion, sliced
2 cloves garlic
1 tsp dried thyme
2 tsp dried parsley
1/4 cup skim milk
1 tbsp corn flour
2 tbsp skim milk
2 tbsp sherry or dry vermouth (optional)
1 tsp black pepper
Salt to taste

Heat the butter and olive oil in a soup pot or dutch oven on medium heat. Heating both the butter and olive oil will keep the butter from browning to quickly. Add the garlic and onions and saute until onions are soft, about 5 minutes.

Add in mushrooms and saute for another 6 - 7mins until mushrooms are brown. Add in chicken or vegetable broth. Bring to a boil and add in thyme, parsley, black pepper and vermouth. Cover and simmer for about 15 - 20 mins until mushrooms are soft. Add salt to taste.

Turn heat off and stir in 1/4 cup milk. In a small bowl, mix together corn flour and remaining milk and stir into soup. I find that using a food processor helps to pulse the mushrooms better than an immersion blender, but you can use either one.

You can serve with some grated Parmigiano or just plain.

Tuesday, September 2, 2008

Chicken Scaloppine and Arugula Salad


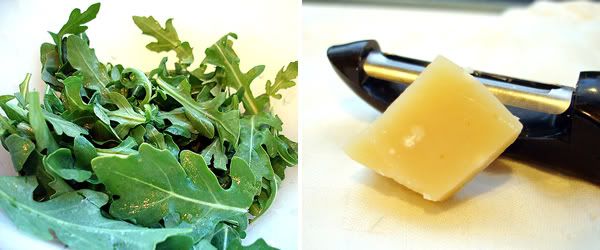
I realize that in recent days I've been posting a lot of arugula recipes, mostly first because I like arugula-flavoured politics (*insert ding-dong cue*) and also because I bought such a huge bag and forgot that I would be home alone for two weeks. Hence the unfortunate near-daily arugula dinners.

Also, I have a practice session for my defense tomorrow and needed a super easy and quick dinner. I found a similar recipe at marthastewart.com for this, but I made one that's a little different and has some tomatoes and capers. A light hefeweizen or Sauvignon Blanc pairs excellent with this meal, and you can round it off with some home made garlic bread.

Chicken Scaloppine and Arugula Salad
Serves 2

1 chicken breast, butterflied two yield pieces
2 cups baby arugula leaves
1.5 tbsp lemon juice
1/2 medium lemon, cut into wedges
1 medium roma (plum) tomato, sliced
1 tbsp capers
Salt and pepper
Parmigiano.

Wrap the chicken breasts in cling film and smack them with a meat mallet or a hevay pan until they are flat and thin.

Season with salt and pepper. Heat 1 tbsp olive oil in a large skillet and sear the chicken on medium-high heat until cook through. The meat cooks faster if you prick it a few times with a fork. Fry for about 5 mins on each side.

In a bowl, toss the salad, lemon juice, extra virgin olive oil and capers. Arrange on plates. When the chicken breast is cooked, lay it on top of the arugula salad, top with tomato slices and shaved Parmigiano.

Monday, September 1, 2008

Victorian Sponge Cake with Vanilla-Pear Jam Filling


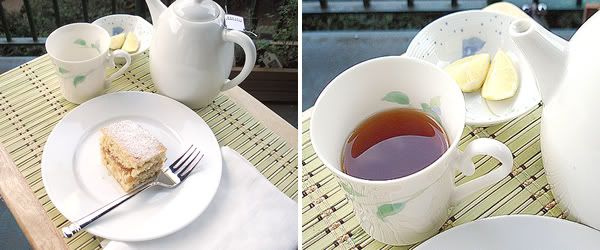
You know one of those days when you get a painful urge to eat something, but you realize that if you made an entire recipe of it, you would have to finish it all by yourself and live regretfully for the next two months or so? Well, I had one of those days today; I craved some crumbly Victorian sponge cake. Now, Victorian sponge cakes usually require two 8-inch cake pans that you bake separate sponge cakes in and then sandwich together with your favourite jam and top off with a some icing sugar. It goes delicious with a cup of warm Earl Grey whilst sitting out on the deck and enjoying the sunny dreary err... "it can't quite make up its mind" Seattle weather.


I used Delia's Smith all-in-one Sponge Cake recipe with some French Vanilla-Pear Jam I picked up at Williams-Sonoma a while back, but instead of using two 8-inch round cake pans, I halved the recipe and used a regular 8-inch square pan. When it cooled down, I cut that into half and sandwiched them together to yield a 4x8 Victorian sponge cake... well, not quite Victorian perhaps, I would dub it the Cubician Sponge. I added a teensy bit of brandy to the pear jam and layered it on, yielding a wonderful light and crumbly cake with a delightfully tipsy filling.

Note: I didn't include the recipe, you can click through the link and support Delia at her online website.