Sunday, August 30, 2009

Midnight Moon Gouda Cheese


[Image from pdphoto.org]
One of my favorite things to do everytime I go to Whole Foods is look and sample at the extensive cheese collection. While the quality of the cheese selection varies from place to place, the Whole Foods I frequent has an INCREDIBLE selection, much more so than any other "pretentious" cheese importers I've been to in Seattle.

Over the past weekend, I picked up an extremely small piece of Midnight Moon Gouda Cheese which is imported by Cypress Grove Creamery in California. It costs $21.99/lb which I guess is one of the more expensive goudas I've seen. But holy lord, it was worth the $7.98 I paid for a wedge smaller than my hand.

The cheese is made from goats milk and aged for 12 months and bursts into a wonderful nutty creaminess in your mouth. There's subtle goat cheese flavors with a mild saltiness that goes so incredibly well with a fruity rose from Spain or even a crisp
French Chardonnay. Grilled peaches rounds with an endive salad rounds off the cheese and wine for a splendid summer supper.

P/S: I wrote this in lieu of actual cooking updates, I think I'm going to do a bit more of wine, cheese and beer updates now since I've been consuming more of these things due to lack of time!

Saturday, August 8, 2009

Rendang Ayam (Chicken Rendang)

Chicken rendang is one of those dishes I grew up eating but never realized how bad it actually is for me. Rendang is basically and Indonesia or Malaysian style curried chicken simmered in coconut milk and dessicated coconut. I remember ladling spoonfuls after spoonfuls of it for my morning "nasi lemak" jaunt.

When I first started cooking chicken rendang, then I realized that unless I wanted to die of a heart attack at 29, I had better cut it out of my diet immediately! I haven't eaten chicken rendang in over a year, and it just seemed an appropriately Malaysian dish to cook for my couples' date night (part of my surburban, growing old ritual). This recipe is something I've spend a long time perfecting, and which I promise you, will be one of the best rendang recipes you'll ever find.

If you can't find screwpine (pandan) leaves in the fresh produce section of an Asian supermarket, try the frozen aisle. If you're in Seattle, Vietwah supermarket down in the ID has it frozen (It's call La Dua in Vietnamese), alongside some frozen banana leaves. I literally had to run to four different stores just to locate pandan leaves and kaffir lime leaves. So if you want to attempt this dish, make sure you have a decent Asian market close to you. You need tons of shallots and lemongrass to ensure that you have a thick gravy instead of a wussy, soupy one.


I also used fresh chillies instead of dry ones - I think dried chillies are much spicier and definitely not as tasty. Jalapenos or habaneros don't really work for this either - instead I used Korean chillies, also known as the Holland varietal which is milder, sweeter and the skin is much smoother and blends easier. If you can't find any Korean chillies, use 2 red Jalapenos and 8 dried chillies, soaked and deseeded.

Chicken Rendang
Makes 6 servings

2 lbs chicken (I used 6 chicken drumsticks and 6 pieces skinless, boneless thighs)

8 fresh red chillies, deseeded and rinsed and cut into 1 inch pieces
15 shallots, peeled and quartered
4 cloves garlic, smashed
1 piece fresh ginger (about 2 inches long), coarsely chopped
2 teaspoon ground turmeric

1/3 cup olive or vegetable oil

4 pieces lemongrass
5 pieces kaffir lime leaves
2 screwpine (pandan) leaves, knotted
1 1/2 cups coconut milk
1 1/2 cups dessicated (shredded) coconut
1 tablespoon brown sugar
1 1/2 teaspoon salt

In a frying pan over low heat, toast the shredded coconut until it becomes a dark golden hue. Set aside to cool. Cut the lemongrass into 3 inch pieces and give each piece a whack with a rolling pin to release the flavors.

Grind the chillies, shallots, ginger, turmeric and garlic in a food processor until fine, but do not puree.

In a large wok or dutch oven, heat the oil over high heat. Add in the grinded chilli mixture and fry for about 15 minutes until the mixture is golden and fragrant.

Add in the chicken and stir fry for an additional 10 minutes, until the chicken turns yellow from the turmeric and is coated through with the chili mixture.

Add in the coconut milk, lemongrass, kaffir lime leaves and pandan leaves. Bring the mixture to a boil, cover and simmer over low heat for about 45 minutes until the chicken is tender and cooked through.

Toss in the toasted, shredded coconut, and stir to mix thoroughly. Allow the rendang to simmer uncovered until the gravy is thick (about 15 minutes). Add in salt and sugar, stir and turn the heat off.

Remove the lemongrass, kaffir lime leaves and screwpine leaves and serve the chicken rendang with rice, bread or "nasi lemak"!

Wednesday, August 5, 2009

Japanese food made easy

Oh, dear. I've become one of those bloggers that never update. And I apologize sincerely - I've been busy with work, fretting over work and have generally just not been in the mood to do much cooking (or posting about it). I made a fantastic meatloaf the other day though (if I may brag), and will put up the recipe when I eventually have the time but in a brief respite, I thought it would be nice to showcase the kind of meals I've been having - quick and really just not much to it.

We went over to the International District to find some ingredients for a chicken rendang recipe I wanted to make over the weekend. We ended up picking up some sashimi grade salmon for an easy Japanese dinner. Add some avocado, Calrose rice and tobikko and you have a nice donburi. The CSA brought over some sugar snap peas and green beans and I followed a really great recipe by Giada De Laurentiis to make a light and refreshing "Anytime Vegetable Salad".

Have a great week! Chicken rendang recipe is promised soon.

Tuesday, July 21, 2009

Mediterranean Quinoa Salad

Oh my goodness. As I type this, I am sitting in a sweltering room, leaking sweat from the back of my chubby knees and wondering why the hell it hasn't rained in seven days. I know I moan and groan a lot during winter when it actually does rain, but it is really too bloody hot. Global warming, damn you.

When it's this hot out, I don't really enjoy being outside at all, so I usually just sit indoors and stare at the fan with a tall pitcher of iced tea and do nothing. But of course, my tummy gets all rumbly because I'm a greedy person, so I have to get up grudgingly and make some food.

Usually all I really crave in this weather is some lovely pinot grigio and prosciutto wrapped melon slices. But today I discovered I had some lovely wild king salmon fillets in the freezer and thought a Mediterranean style salad with some cooling cucumbers would make a lovely supper. The CSA also brought along some really beautiful heirloom cherry tomatoes that were just so cute and tasty (always seems wrong to put tasty and cute in the same sentence)!

This recipe is my take on the classic Mediterranean couscous salad, except that it uses quinoa and white wine vinegar. Quinoa is much better for you and works as a one dish meal in almost anything since it contains both carbs and protein. This recipe also makes about enough servings to last you through the week, so you can just be lazy and lie in a bath of ice cubes instead.

Mediterranean Quinoa Salad
Makes about 8 servings

1 cup quinoa, cooked according to package directions, cooled and fluffed *see note
2 medium English cucumbers, seeded and diced into 1/2 inch cubes
1.5 pint cherry, grape or heirloom cherry tomatoes
10 large Italian basil leaves (or about 20 smaller ones), julienned
10 large mint leaves (or about 20 smaller ones), julienned

For the vinaigrette

1/4 cup white wine vinegar
1/2 cup extra virgin olive oil
3 cloves garlic, minced
1 small shallot, minced
1 teaspoon dried oregano
1/2 teaspoon sea salt
Freshly ground black pepper

Combine quinoa, vegetables, mint and basil in a large bowl. In a small bowl, whisk together the ingredients for the vinaigrette and add in to the quinoa salad. Toss well to combine. Serve with salmon fillets or tuna kebabs or sprinkle feta cheese over and eat as is!

*Note: To make perfect quinoa for a salad so that it doesn't turn out too mushy, always wash your quinoa well, strain and use 1 1/4 cup water to 1 cup quinoa. Once your quinoa is cooked, allow it to steam, covered for an additional 5 minutes.

Friday, July 3, 2009

Cultured Butter OMGOMGOMG

For some reason, I've never figured out why eating bread and butter in France always tastes better than eating it in any French Boulangerie in the United States (not to mention French cafes here are not really French cafes but silly pretentious frou frou ones). Butter here always tastes flat and greasy and kind of I don't know, bland? Call me ignorant or unfortunately unaware, but I recently discover the miracle of cultured butter - which I can make at home and it tastes like I bought it for $15 a pound at Whole Paythroughmyarse.

Anyway, cultured butter omgomgomg. Yes, it makes me that giddy. OMG! I found the method for making cultured butter on The Traveler's Lunchbox and well, OMG!

Cultured butter is a breeze to make, and costs half the price of something from Vermont Butter and Cheese Company or imported butter. All you need is a pint of the BEST heavy cream you can find, with the highest butterfat content and is not ultra-pasteurized, some creme fraiche and a lot of patience!

This butter goes absolutely FANTASTIC with crusty slices of baguette (as I'm typing, the roof of my mouth is bleeding from the whole loaf of baguette I just inhaled). I'm glad there are at least some decent baguettes here in Seattle, and with this cultured butter and a nice strong cup of cafe au lait, it's almost like I'm in Paris.

Cultured Butter (adapted from The Traveler's Lunchbox)

*Note: You can change the amount of cream used to yield more or less butter. One pint of cream will yield about 1 stick of butter and 1 cup of buttermilk. For each pint of heavy cream, use 2 tablespoons creme fraiche.

1 pint heavy cream (I used one with 40% butterfat, pasteurized)
2 tablespoons creme fraiche (see note above)
A big bowl of iced water
Fine mesh strainer

In a clean glass bowl, combine the heavy cream and creme fraiche. Stir lightly with a wooden spoon an cover with a clean dish towel. Place the covered bowl in a warm place, ideally the air temperature should be about 75°F (I put mine in the oven overnight). Leave it for 12 - to 24 hours.

After that period, the cream should look a little thicker and you can test with a clean spoon to see if has become tangier. If the cream is gassy and bubbly, you will want to toss it away and start over. It has always work for me within 12 - 14 hour period. Melissa from The Travelers Lunchbox suggests that the ideal temperature for churning is 60°F but I've discovered that at such a temperature, my butter takes forever to come together. So I take it straight from the oven and start churning using a handheld mixer on medium speed. It usually comes together within 20 minutes.

Churning may get a little messy, so you want to don an apron and use a really deep bowl. I used a handheld mixer on Speed-3. The first thing that will form when you beat the cream is whipped cream, which is thick and white. If you keep on beating, little yellow bits will start to curdle, and you know you have your butter. Bring the speed down to low and beat a while longer until the liquid is clear white (buttermilk) and your butterfat has come together.

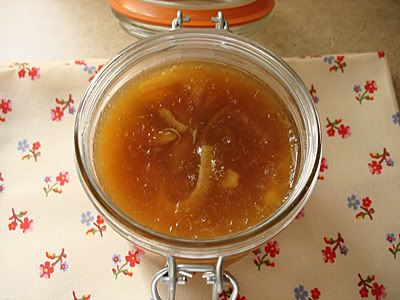
Strain the buttermilk into a bowl and you can keep this for pancakes or muffins. Pour a cup of ice water over the butter and knead the butter with a fork. Discard the water when it becomes cloudy. Do this multiple times until your water is clear. Your butter will now be in a ball, and will be quite tough. At this point, you want may want to add a bit of sea salt to flavour your butter and give a final knead to release most of the water.

Put your butter on a piece of paper towel and squeeze to release any remaining water. You may want to do this a few times to ensure that your pat of butter is dry.

And voila! You now have salted, cultured butter! I wrapped mine in wax paper and put it in a Ziploc bag - if it is salted, it should last up to a month (if you don't finish it within two days with a loaf of baguette).

With the buttermilk, here's what I made:

Tuesday, June 9, 2009

Spinach and basil pesto

I know what you're thinking: There must be something fundamentally wrong with this girl - she's like a carb factory and damn it, pasta again?

I think I have a right to defend myself here. Our CSA has been bringing a big load of spinach for a couple of weeks now, and as much as I love spinach, I don't eat it as fast as Popeye himself and always find myself throwing it out when the spinach turns to mulch in the refrigerator. The best way to preserve veges is of course freezing them or in my case, add a whole lot of nuts and cheese and turn them into pesto.

There are also a couple of things I tend to splurge on: extra virgin olive oil, Parmigiano-Reggiano (and I'm as pretentious as to say, not parmesan, pish!), good-quality pasta (not that Safeway mush), coffee, wine and beer. Oh and bread too.

So when it comes down to it, the best dinner I can make is a bowl of pasta topped with Parmigiano and a glass of wine!

This pesto will keep in for about a week in a tightly sealed container in the fridge. The best way to serve this is to dump two heap tablespoons over steaming hot flat pasta, and toss with some freshly cracked black pepper, a few cherry tomatoes and a smidgen of crumbled goat cheese. Heaven! (And in heaven, you get to eat this with a glass dry Côtes du Rhône rose out on a sunny deck).
(Mr. Basil Plant - purveyor of fine frontyard basil leaves)

P/S: Use the best ingredients you can find, it makes a world of difference.

Spinach and Basil pesto

Makes 2 cups pesto

2 cups fresh organic spinach (hard stems removed and roughly chopped)
1 cup sweet basil (stems removed)
1/2 cup grated Parmigiano
1/4 cup toasted pine nuts
2 cloves garlic, quartered
1/2 cup extra virgin olive oil
Salt to taste

Chuck everything except the olive oil slowly oil and salt in a food processor and pulse until it becomes a paste. Add in the olive oil slowly and pulse just to combine, about 3 or 4 times.
Stir in the salt to taste and you're all set.

Sunday, June 7, 2009

Mini Chelsea Buns

Two of the my favourite things about the British: 1) The ability to crack a really good joke with a deadpan 2)The ability to sit down for tea even in times of crises.

For the first, I think it stems mostly from my innate cynical and sarcastic outlook on life. The second, is due to the fact that I absolutely love tea and the pomp and fuss that comes with a true British afternoon tea. I recently bought a book on afternoon tea for my coffee tea table and found myself drawn to a rather simple recipe for mini Chelsea buns. Chelsea buns are the British version of the cinnamon bun and usually has currants and other dried fruit.
Let me warn you that these things are addictive! They are so tiny that before you know it, you've swallowed 18 of these - honey-soaked fingers, contented smile and all. Serve with some first flush Darjeeling tea and a pot of raw wildflower honey for a great afternoon tea experience.

Note: I made this non-dairy but you can (and should) use milk and butter for this recipe, it makes a WHOLE lot of difference

Mini Chelsea Buns
Adapted from Afternoon Tea by Susannah Blake
Makes 16 mini buns

3 1/2 cups (420g) bread flour
1/4 cup granulated sugar
1/4 oz. active dry yeast (one packet)
1 teaspoon salt
2/3 cups milk (or unsweetened soy milk)
3 oz. butter (or shortening), melted
2 eggs beaten
1/4 cup chopped dried apricots
1/2 cup raisins
3 tablespoons dried currants
1/2 cup packed brown sugar
1 1/2 teaspoon ground cinnamon
Honey, for brushing

Sift the flour, sugar, yeast and salt into a large bowl. Place a saucepan over low heat and add in the milk and butter, stirring gently until the temperature is lukewarm. Remove from heat and mix in the beaten eggs.

Make a well in the center of the flour mixture and pour in the milk mixture. Use a stiff spatula to combine all the ingredients until a soft dough forms. Turn the dough out onto a lightly flour surface and knead until smooth and shiny (about 10 minutes). If using a machine, knead for 5 minutes.

Return the dough to the bowl and cover with plastic wrap. Let stand in a warm place for about an hour until the dough rises to double its size.

Grease an 8x8 inch pan. In a small bowl, combine the apricots, raisins, currant, brown sugar and cinnamon. Divide the dough into four equal sections. On a lightly floured surface, roll out the each dough section into a rectangle, measuring 5x8 inches. Brush lightly with melted butter and sprinkle the cinnamon sugar mixture evenly. Roll the rectangle into a log, beginning with the long end. Brush lightly again with some melted butter to seal the ends. Cut into four equal parts and arrange in the prepared pan. Repeat with the remaining dough, such that you get 16 buns. Wrap the baking pan in plastic wrap and let stand for another 30 minutes.

Preheat the oven to 400°F. Bake the buns for 20 minutes at 400°F. Remove and brush the tops lightly with honey, return to the oven and bake for another 5 minutes until golden brown. Remove from the oven and let cool in the pan for 10 minutes. Remove from pan and let cool completely on wire rack. Tear apart and serve.

Tuesday, June 2, 2009

Easy Weeknight Dinner: Penne alla Insalata Caprese


I have a confession: Give me a few balls of well made mozzarella and I go weak at the knees and fall into greedy mess. Fresh mozzarella is my kryptonite.

A couple of days ago, we picked up some buffalo milk mozzarella from Costco - I'm discovering new cheeses everytime I head there. Who knew, Costco of all places! In summer, one of my favourite meals is the traditional caprese salad made up of fresh cherry tomatoes, balls of mozzarella and fresh basil. I usually eat that with some grilled ciabata and olive oil. But I thought that today, after having finished a final paper, I should kick back with a glass of Muscadet and enjoy the sunny weather with some Mediterranean flair.
This dish is inspired in part by the Caprese salad and by Jamie Oliver's 'Mothership Tomato Salad' found in his 'Jamie at Home' book. Unfortunately, we don't get enough sun in our yard to plant tomatoes, something which I hope to remedy by finding a south-facing yard the next time we move. In the meantime, I used store-bought organic cherry tomatoes, mozzarella di bufalo and the basil that came in the CSA for this really summery dish!

Pasta alla Insalata Caprese
Makes 4 servings

12 oz. whole grain penne
3 balls mozzarella di bufalo or regular cow's milk mozzarella (ovoline), cut into 1/2" cubes
1 pint cherry tomatoes, halved
1 bunch fresh basil leaves (about 2 oz.), julienned
Fresh sea salt and freshly ground black pepper

For the dressing
6 tbsp extra virgin olive oil
2 tbsp balsamic vinegar
2 cloves garlic, minced finely (about 2 teaspoons)
1/4 tsp Chile pepper flakes or Aleppo pepper flakes (or to taste)

Toss the cherry tomatoes with 1/2 teaspoon sea salt. Set aside to drain in a colander over a small bowl for 15 minutes.

Cook the pasta according to directions until al dente, drain and run under cold water until it reaches room temperature. Combine with the cubed mozzarella and prepared tomatoes.

In a small bowl, whisk together the ingredients for the dressing. Drizzle over the pasta, top with julienned basil leaves and season to taste with sea salt and pepper. Toss gently to combine and serve with a dry white wine.

Tuesday, May 26, 2009

Easy Weeknight Dinner: Turkey and Avocado Donburi

While basking in the brief respite of the weekend, I got into a discussion with a couple of friends about finding time to cook. Most of them, being students like me, usually resort to either eating cafeteria food (which is ultra expensive) or standing in line at 'Pickles and Fries'(we sell burgers too!). I don't particularly like Pickles and/or Fries. I'm also extremely nitpicky when it comes to paying $6.75 for an organic BLT at the cafeteria. One way I've found to get around this is to make sure your freezer and pantry is always well stocked with a good selection of grains and meat, and you can whip anything up - for example a donburi.

Donburi is basically a Japanese fast food made up of a rice bowl topped with a mixture of ingredients (usually meat and vege mixed together). This donburi recipe is super easy, involves a relatively quick stir-fry and is finished off with fresh cubed avocado and tobiko (flying fish roe). Of course, you can omit the tobiko if you're not incline to eat fish eggs. Otherwise, the tobiko lends a subtle salty flavor that complements the rice and avocado really well!

Turkey and Avocado Donburi
Serves 4

2 cups genmai (Japanese brown rice)

1 lb lean ground turkey
3 cloves garlic, finely minced
1 medium red bell pepper, diced into 1/4" cubes to yield about 1 cup
1 stalk green onion/scallions
1 cup frozen peas
1 avocado, peeled, pitted and cubed into 1/4" cubes
1 small jar tobiko (from any Japanese grocery store)


For the sauce
2 tbsp sweet bean sauce *
2 tbsp mirin *
2 tbsp soy sauce
2 tbsp oyster sauce
3 tbsp sweet soy sauce
Ground black pepper

Cook the rice according to directions for your rice cooker or the directions on the packet. 2 cups of dry genmai should yield about 4 cups cooked.

In a wok or saute pan, heat up a generous amount of vegetable or extra light olive oil. Fry the ground turkey for about 4 minutes until the pink parts start to turn white. Make sure you break up the ground meat properly with a heavy wooden spatula. Add in the garlic fry until the turkey is almost cooked through. Add in all the ingredients for the sauce and mix to combine. Toss in the diced red pepper, peas and scallions. Fry for another 2 minutes and turn the heat off.

To serve, arrange on cup of rice in a bowl, top with turkey mixture, avocado cubes and a teaspoon of tobiko.

* You can use the sweet bean sauce found at the Chinese section of the grocery aisle or for a more authentic flavor, use shiro miso (sweet miso).
* If you don't have mirin, just substitute with equal part rice wine and sugar.

Thursday, May 21, 2009

Easy Weeknight Dinner: Penne with Zucchini, Peas and Sausages

It's midweek, work is tiring and all you want to do is put your feet up, sink into a glass of wine and have a nice dinner when you get home. Pasta is perfect for those days when you really don't feel like doing anything but don't really feel like having take outs either. Let's face it, you can throw ANYTHING together with a handful of whole wheat pasta and make a delicious meal out of it. The trick is to add a good helping of vegetables to make it a wholesome meal. This recipe is one that I go back to time after time especially during this wonderful spring season when the weather is warm and meat sauces just seem to heavy. Zucchini and peas lend a refreshing amount of greens while cherry tomatoes, sausages and creme fraiche add a sophisticated touch for a simple yet delicious and healthy weeknight dinner.

Penne with Zucchini, Peas and Sausages
Serves 2

4 oz. whole wheat penne
1 stalk green garlic or 1 whole garlic clove, minced finely *see note
1 mild Italian sausage link, sliced thinly on the diagonal (about 1/4" thick)
1 medium zucchini, sliced thinly on the diagonal (about 1/4" thick)
1 cup frozen peas
1 cup cherry or grape tomatoes
2 tbsp creme fraiche, mascarpone cheese or cream cheese
1 tbsp chopped fresh parsley
A generous helping of grated Parmigiano Reggiano
Salt and pepper
Extra Virgin Olive Oil

Cook the penne according to the directions on the package.

Meanwhile, heat a generous amount of the olive oil in a saute pan (I used roughly 1 tbsp) over low heat. Toss in the minced garlic and saute for a one minute and add in the sliced sausages. Brown the sausages for a few minutes and add in the zucchini. Sprinkle with some salt and turn the heat up to medium. Saute the zucchini and sausages until the zucchini is softened, about 5 minutes. Add in the peas. Cook for 1 minute.

Turn the heat down to low, add in the cooked pasta, creme fraiche, cherry tomatoes and parsley. Season to taste with salt and pepper. Turn off the heat and toss everything together to combine. Spoon out into bowls and serve with grated Parmigiano. Enjoy with a good glass of slightly chilled Chardonnay!

*Note: Green garlic which came in my CSA is like scallions but is actually the young stalk and bulb of a garlic. It has a milder taste than full grown garlic. If using green garlic, discard the yellow stalks and dark green leaves. Use the bulb and the light green parts of the stalk.

Tuesday, May 12, 2009

No-Fail Potato Salad for Memorial Day Weekend


The everlasting potato salad: always up there with zucchini bread, lemon cake, grilled salmon and hamburgers as things that will never ever go away. Everyone has a generational recipe handed down in sworn secrecy; everyone has that special potato salad recipe that they bring to potlucks and smile gently knowing that it's THE best potato salad ever.

But the truth is, sometimes, there are those potato salads that just look (and taste) like horse puke. Yes, those kind smothered in so much mayonnaise, topped off with so much hard-boiled eggs, and mashed into such fine pulp it feels like you're swallowing a vat of lard-soaked bread. I don't particularly like potatoes , but when the CSA came around with a beautiful looking bunch, I knew I had to make the one simple dish that has never failed me.

I used an eggless mayo (only 35 calories per tablespoon!) from Trader Joe's that gives the potato salad a slight creaminess, but you can use low-fat mayo instead. Or even better, just use more mustard and top if off with olive oil and some balsamic vinegar. Try this for your Memorial Day weekend barbecue with said everlasting hamburgers, lemon cake and lots and lots of wheat beer. It's perfect especially for the American Craft Beer Week happening now. And just to make sure it's no-fail, here's everything you need to know:

Sweet relish, egg-free mayo, whole grain mustard, potatoes, white wine vinegar, onion, celery, parsley and spring onion

Chop celery and onions

Quarter cooked potatoes

Mix remaining ingredients

Keep away from neighbours

Konosur's No-Fail Potato Salad
Makes six 1-cup servings

2 lbs new red potatoes, scrubbed, skin on
2 stalks celery ribs
1/4 large red onion, diced yield 1/2 cup
2 tbsp sweet relish
3 tbsp egg-free mayonnaise (substitute with low fat mayonnaise if not available)
1.5 tbsp whole-grain mustard
1/4 cup white wine vinegar
2 tsp freshly ground black pepper
1/2 tsp kosher salt
2 tbsp finely chopped fresh flat-leaf parsley
1 stalk spring onions, chopped

In a large pot, cover the potatoes with enough cold water so that the potatoes are all submerged. Bring the water to a boil, cover and bring the heat down to medium-low so that the water is still rolling but not boiling over. Cook the potatoes for about 15 minutes and prick with a fork to make sure the middle is cooked through. Otherwise, cook for another 5 minutes and check again.

In the meantime, finely chop the celery and combine with the minced onions in a large bowl. When the potatoes are cook, discard the boiling water and run some cold water over them for about 1 minute. Allow to cool until you can touch them and then quarter them, leaving the skins on. Toss the quartered potatoes in the bowl with the celery and onions. Add in all the remaining ingredients and very gently toss to combine, making sure that you don't break up the potatoes.

Friday, May 8, 2009

Rye Crackers & some website updates


My friends..., well, ok. That's not the best way to start, I stopped being John McCain about a week ago, but yes. Dear readers, there is news on Konosur! I've decided to change the web design into something more pretentious that will hopefully work out for the best. Please let me know if you find the design to your liking or if you prefer the former, sparse design.

In other news, you can now follow my mundane musings on Twitter. I've decided to jump on the social hipster bandwagon and do the Tweet (that's right, it's a dance where you put your left leg in the air and press the keys on your cellphone really fast). So far I've been twitting tweeting about my disastrous viewing of 'Australia' but I promise to provide more susbtantial 140-character ramblings in the future.


Here's a healthy recipe (sort of) for some rye crackers that would go absolutely fantastic with some goat cheese, a bottle of Cotes du Rhone and a living room discussion about the silliness of 140-character ramblings nobody really cares about.

Rye Crackers
Makes about 16 2x4 inch crackers

1 cup unbleached rye flour
1 cup whole wheat flour
3/4 tsp baking soda
1 tsp salt
2 tsp caraway seeds OR toasted sesame seeds(optional)
1/2 cup olive oil
1/4 cup and 1 tbsp cold water
Flaky sea salt like Maldon (I used an Australian Pink Flake Sea Salt)

Preheat the oven to 350°F. Line a baking sheet with parchment paper.

In a large mixing bowl, combine the flours, baking soda, salt and caraway or sesame seeds. Make a well in the center and add in the olive oil. Using a wooden spoon, swirl the flour towards the center into the olive oil to combine. Drizzle cold water slowly into the mixture, stirring until a ball of dough forms. The dough will be crumbly but still holding together.

Divide the dough mixture into two. For each half, roll out into a rough square about 1/8 inch thick. Try to roll it out as thin as you can, dusting lightly with whole wheat flour to prevent sticking. Sprinkle with flaky sea salt. Place the rolled-out dough onto the prepared baking sheet and bake at 350°F for 8-10 minutes until golden brown. Remove from oven and cut into rectangular crackers with a pizza cutter. Repeat for the remaining dough.

Cool the crackers completely and store in airtight containers for up to 4 days.
Note: The crackers are soft and crumbly, to make it harder, bake for a little longer at 325°F.

Saturday, May 2, 2009

A heart to heart and some Flambeed Pineapple and Coconut Cakes

I had a conversation a couple of days with someone about running a food blog. The biggest issue I think for most food bloggers is being able to find time in the middle of a hectic day. This is especially true for those without all the fancy studio lighting - you have to be at home in the middle of the day just to get a half decent photograph. I usually try to get to school early, work like crazy and take off at 3.30pm so I can catch the last glimmer of light. I'm really anal about making sure I finish work before I leave though, and lately that has gotten quite irksome and tedious.

The one thing I've noticed about successful blogs like The Pioneer Woman, Smitten Kitchen, Tartelette, etc. etc. is that most of them either work from home or live a life where they are supposed to cooking all the time. They're all chefs, food writers or stay-at-home photographers. It can get quite disheartening after a while especially if you're trying to match your point-and-shoot with the cameras that these bloggers have that can trace Martian life and pick up radar pulses from the next galaxy.

I run a food blog because I love cooking and eating, I love having things come out of the oven and being able to look at it like an incredible achievement (I HATE baking bread because it takes too damn long!). It makes me happy when people tell me they like my cooking, or better yet, when they tell me my personal recipes are their favourites. Does that make me shallow and selfish in some way? Perhaps, but then I'm happy when the people I'm feeding are happy. And if I dare say, about 80% of the time think I am able to make a given recipe a whole lot healthier without compromising on taste (take that, Ina Garten!).

So why do you run a food blog? I think it's an interesting discussion and I would like to know why you do what you do!

In the meantime, enjoy a cautionary video of me trying hard not to burn down the house (and the dog) while making flambeed pineapples! May include some profanity and a barking dog. No animals or fingers were hurt in the making of this video.


Flambeed Pineapple and Coconut Cakes
Makes about 24 little coconut cakes, 4 servings
Adapted from The Organic Seasonal Cookbook

For the coconut cakes
3 oz. (about 2 cups) unsweetened coconut flakes (I used a reduced fat kind from Whole Foods)
1/4 cup granulated sugar
1/2 stick butter (vegan option, use Earth Balance or Saffola), melted and cooled slightly
1 egg, beaten

For the flambeed pineapples
1 tbsp butter
2 15 oz. cans of pineapple chunks in juice
1/4 cup sugar
1/2 cup Carribean rum or light rum

Preheat the oven to 350°F. Line a baking sheet with a piece of parchment paper.

In a medium bowl, mix together the coconut and sugar. Slowly drizzle in the melted butter, stirring to combine. Add in the beaten egg and use a spatula to mix together the ingredients.

Use a dariole mold or a shot glass (I used a 2cl jigger!) to mold the coconut mixture into little pyramids on the prepared baking sheet. Bake at 350°F for 15 minutes until the coconut cakes are browned.

To make the flambeed pineapples, melt the butter in a stainless steel or cast iron pan. Strain the pineapple chunks to discard the juice and saute the chunks over medium heat for 5 minutes, stirring constantly. Add in the sugar and cook for another 4 minutes until the pineapples start to caramelize and are soft but not mushy. Pour in the rum and give the pan a quick shake, and set the rum alight (Be careful here! Please remember to stand back from the flames and don't attempt this if you're not quick!).

Serve with the little coconut cakes and vanilla ice cream when the flames have died down.

Thursday, April 23, 2009

Lemon and Lime Marmalade

Having your wisdom teeth pulled out is not fun. Despite what blogger #800 says about having his taken out at 9am and eating steak at 6pm. He must have been either terribly drugged up or was already on crack to begin with. And when you're at my age when your bones are as dense as your brain, the healing process takes about three times longer.

I had mine taken out last Friday and am still suffering the after effects of vicodin overdose, a throbbing sensation in my left ear and the distinct smell of gums. I looked like John McCain for the better half of the week, but the nut-filled cheeks have slowly dwindled away and all I'm left with now is teeth socket that has been soaked to the core with homemade chicken broth. I never thought I would say this but I'm actually quite sick of ice cream. What has this world come to!

Anyway, on to happier things, while drugged up on a cocktail of painkillers, I managed to potter around long enough without burning down the kitchen to whip up some lemon and lime marmalade, something that's entirely British but is a very good way to get rid of an overstock of lemon and limes that we bought in bulk from Costco in a fit of madness. This marmalade is a staple in British pantries (along with Marmite!) and puts a little zing in your morning muffins with a dab of butter. I made it less sweet because I like the bitter/sourish taste but you can up the sugar amount from 1 lb to 1.5 lb.

Lemon and Lime Marmalade
Adapted from Delia Smith

Makes 4 12oz jars

3 lemons
3 limes
1 lb granulated sugar
3 cups water
1 piece muslin/cheesecloth about 6in x 6in.

Measure 3 cups of water into a preserving pan or heavy-bottomed saucepan. Turn on the heat to low.

Meanwhile, set up the muslin cloth over a small bowl. Squeeze the juice from the lemons and lime into a medium bowl. Set aside the pith, seeds and pip on the muslin cloth. Cut the lemon and lime peel into thin strips. Don't worry about any of the pith that clings to the peel, it will get dissolved and turn into pectin.

Pour the juice into the water and bring to a simmer. Add in the shredded lemon and lime peel. Tie up the muslin cloth containing the pith, pips and seeds and hang it to the side of the saucepan so that it is suspended in the water.

Simmer the mixture, covered for about 1.5 hours until the peels are soft. At this point, wash your jars with warm soapy water, dry and pop into the oven at 225°F. Pour the sugar onto a baking sheet and pop this into the oven as well. Also, put two saucers into the freezer to be used for testing later.

Once the sugar is melted, pour it into the jelly mixture and stir lightly to ensure all the granules are dissolved. Once the granules are dissolved, bring the entire mixture up to boil. Once it starts boiling rapidly, time yourself. Let it boil for 15 minutes and spoon a little of the jelly onto one of the saucers from the freezer. If the jam has set, it will be stiff and not runny on the cold saucer. If it is runny, time yourself for another 10 minutes, and do the same test.

Once the jelly mixture is set, remove the saucepan from heat and set aside to cool slightly for 20 minutes. This is important so that the jelly has time to set.

Spoon the cooled into the sterilized jars.

P/S: I don't do canning, once the marmalade has cooled in the jars, I just pop them in the fridge. It will last for at least a month.

Monday, April 13, 2009

Orange and Almond Tart

As promised, here is the orange and almond tart from yesterday's Easter lunch. I'm much too tired today to go into all the details of concocting this, so I will leave you with words of wisdom: This is the easiest tart you will ever make. 'Nuff said.

P/S: And it tastes like exploding blobs of citrus too! And it can be made dairy-free! And no crazy pastry-making!

(I couldn't resist the temptation, sorry for the missing slice!)

Orange and Almond Tart

Adapted from The Organic Seasonal Cookbook
Makes 6 servings

1 store-bought frozen pie pastry shell

1 unwaxed organic orange
1 stick butter (Earth Balance or Saffola also works)
1 cup granulated sugar
2 eggs, beaten
1 cup ground almonds (or almond meal)

To make the filling, put the orange in a saucepan, cover with water then simmer for 40 minutes, covered, until completely soft. Let the softened orange cool slightly, then cut in half and remove the seeds. Put in a food processor and whiz to a puree. Add the butter, sugar, eggs and almonds and whiz again until smooth.

Unroll the pastry shell over a 8" tart tin. Anchor the edges of the pastry overhang to the side of the tart tin and prick with a fork all over. Pre-bake in oven at 425°F for 10 minutes.

Fill the pre-bake tart shell with the orange filling and bake at 350°F for 40 minutes until the filling is firm. Remove from the oven and let cool. Serve the tart in slices with good vanilla ice cream.