Monday, May 31, 2010

Easy weeknight meals: Beef Stroganoff


There are a few things in my kitchen that I am willing to spend an obscene amount of money on: cheese, bread, milk and anchovies. I love cheese to death. Give me a wedge of Stilton, some good French bread and wine and I'll call it a good meal. Unfortunately, during those rare times I decide that goat cheese and crusty baguette would suffice for dinner, the boyfriend would have to resort to ramen. I sometimes can't help but feel so terribly sorry that he would never be able to have cheesecake or creme brulee or all the wonderful food that cream and cheese creates. I do try however, to hunt down dairy-free alternatives that would work just as well as the real thing - Earth Balance shortening for chocolate chip cookies, garlic sauce instead of tzatziki, Rice Dream in mashed potatoes and soy yogurt in potato salads.

We recently discovered a dairy-free alternative to cheese and sour cream at Whole Foods. I can vouch that the sour cream by Vegan Gourmet taste almost like regular sour cream, with a slight soy flavor that mellows out when added to dishes. In fact, I think their sour cream is so much like the real thing that I've started using it in fajitas and tacos. So for the first time in his adult life, the boyfriend is finally able to try beef stroganoff - not just browned beef and egg noodles, but the whole creamy deal. It's rare times like that I think technology and chemicals have made life that much easier for a handful of people.

This is the recipe I use for beef stroganoff - you can substitute beef slices for ground beef and I've also listed the regular, dairy versions that can be used.

Beef stroganoff
Serves 4

1 lb lean ground beef
2 tbsp butter (or Earth Balance)
1 large yellow onion, diced
6 oz cremini mushrooms, sliced, stems discarded
2 tsp smoked paprika
1 tablespoon Worchestershire sauce
1/3 cup marsala wine (or sherry or red wine)
1.5 cups sour cream (Vegan Gourmet or regular)
1/2 cup milk or Rice Dream
Salt and freshly ground black pepper
8 0z. Egg noodles
Fresh parsley, chopped

Cook the egg noodles according to directions. Drain the cooked noodles, return to pot and toss with a tablespoon of butter. Cover to keep warm.

Heat 1 tbsp butter in a large skillet, add the ground beef. Use a wooden spatula to break up the chunks and sprinkle with a little salt and ground pepper, paprika and Worchestershire sauce. Allow the beef to brown without stirring - about 6 minutes. Flip over, sprinkle again with salt and ground pepper. When all the beef has been browned, remove with a slotted spoon and set aside in a bowl.

To your pan, add the remaining butter and toss in the onion and mushroom. Sprinkle lightly with salt and allow the onions and mushrooms to brown. Remember not to stir as stirring prevents browning. Once the onions and mushrooms have been browned, add in the marsala wine to deglaze the pan, scrapping the browned bits and pieces from the bottom of the pan. Turn up the heat and allow the wine to reduce by half and then turn the heat down to the lowest setting.

Add in the beef, sour cream and milk. Stir gently until the sour cream has melted and a rich thick sauce is created. DO NOT BOIL! Season with salt and pepper. Serve over egg noodles and sprinkle generously with the chopped parsley.


Monday, May 24, 2010

Question for Lost maniacs

How did Jacob ever get off the island to meet with the candidates to persuade them to go the island?

The Sunday that was: Cochon 555

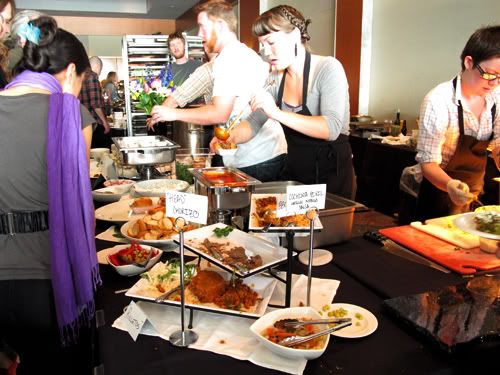
A couple of weeks ago, I managed to snag some coveted tickets to Cochon 555 as part of the Foodbuzz Foodie Correspondent Program. In case you've never heard of Cochon 555 (which I haven't either, up to this point), it is "a culinary event featuring five chefs, five pigs, and five wine makers in a friendly competition for a cause." And let me tell you first hand that five pigs can feed A LOT of people.

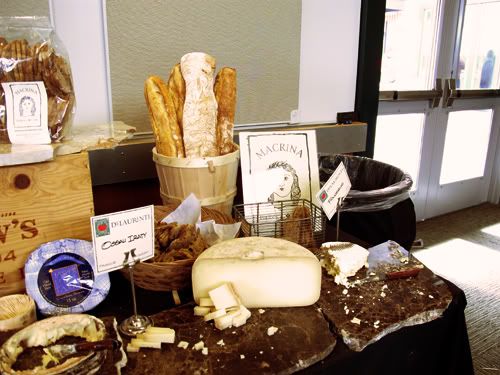
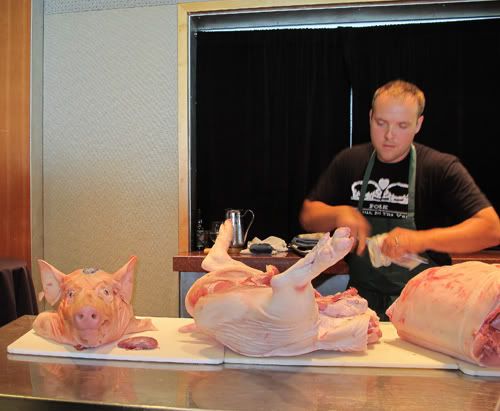
This year's Cochon 555 took place in the Bell Harbor Convention Center right down by the waterfront, which I think is venue that represents Seattle really well. Inside the dining hall, we were first greeted by a cheese selection from DeLaurenti and crackers from Macrina bakery. Ryan Farr of 4505 Meats down in Portland was on hand to demonstrate how to butcher a whole pig. That was by far the most interesting thing I saw at Cochon 555. There were also slideshows of cute berkshire and mangalitsa piggies projected on screen while slightly buzzed people noshed on pulled pork. I don't know if that was in good taste, but I am so glad Foodbuzz gave me the tickets because I had an incredible time; I drank and ate more than I should have (trusty Mr.Tums fixed the problem this morning) and talked to some very interesting winemakers and foodies.

And the piggie said, "Bleu cheese!"

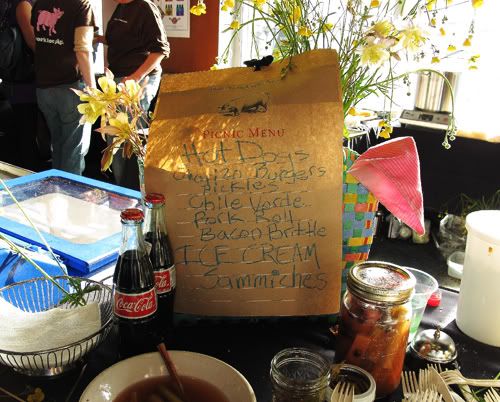
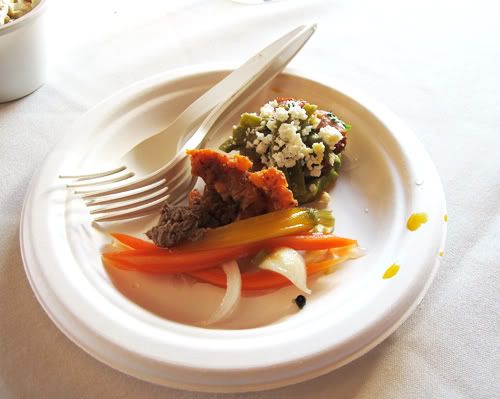
My favorite chef for the event was Tamara Murphy of the now defunct Brasa restaurant. For some reason, her restaurant was never really that amazing, but my goodness - the menu for Cochon was absolutely delicious. I thought her chorizo sliders were the cutest thing ever and tasted perfect topped with slivers of blue cheese, a bowl of chili verde on the side and complete with a glass of 2008 Pinot Noir from Elk Cove Vineyards.

John Sundstrom of the almighty pretentious Lark ended up winning the event, and to prove my point of his almighty pretentiousness, his menu included tarte tatin with bacon caramel. Pretentious but delicious, I suppose. I couldn't get a picture of the tarte tatin close up because people were jostling and I swallowed mine in a split second lest some person kicked me in the shins and stole mine. I did however manage to grab a photo of John Sundstrom himself smiling knowingly, and a man in the background that looks strangely like Steven Spielberg (Do the Waldo thing)!

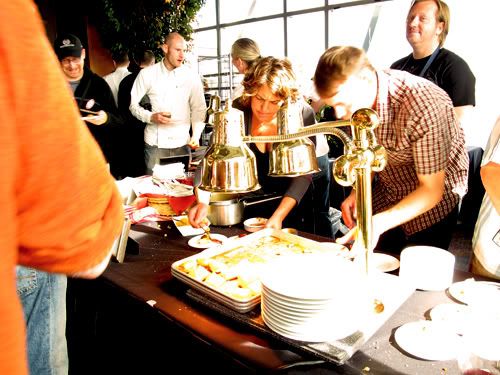
We managed to sneak in some nerdy chat time with some people from Elk Cove (3 kinds of Pinot!) in between lining up for the food samples. The gentleman very kindly suggested pairing the pate from Chester Gerl of Matt's in The Market with the estate Riesling. The other noteworthy small plates I liked were pork dumplings in dashi sauce from Adam Stevenson and a pulled pork dish with sparkling apple cider from Anthony Hubbard of Chow Foods. Also, the "head" chorizo by Mr. Gerl was quite amazing (On a side note, I went to Matt's once for my birthday and found it a little subpar, but I might have to try them again based on their perfomance at Cochon!).

I think many of the food items conjured up by the Seattle "superchefs" were pretty interesting. Most were your standard high-end cafe fare while others were slightly more upscale. The only thing I did not care for were these really gross looking red velvet cupcakes with lard frosting. They tasted sort of like a cross between rancid Betty Crocker canned goop and Safeway cupcakes.

At the end of the day, I went home stuffed with pork goodness, and stumbling slightly from some really good wine. Thank you, Foodbuzz for the great opportunity and here's looking forward to next year's Cochon 555!

Thursday, May 6, 2010

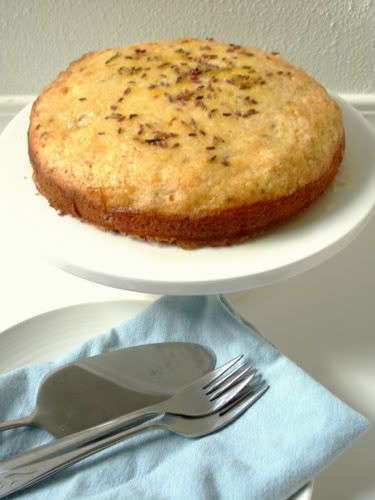
A lemon and lavender cake for Mother's Day

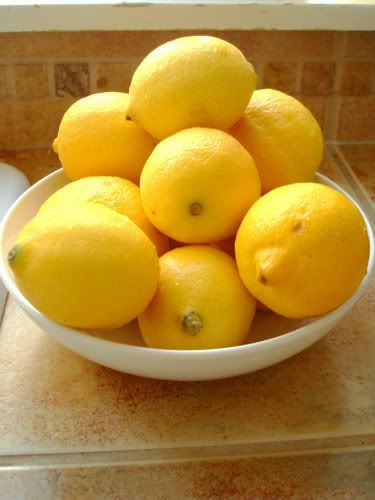
Not too long ago, I was seized by some unbearable need to purchase a bag of 20 baby lemons at Whole Foods. I don't know if it was being in Whole Foods that made me feel I needed to spend money, or if was the fact that lemons somehow scream summer and that in the middle of May, Seattle is 46 degrees and raining. Lemons have an uncanny ability to look attractive in any spot they sit in - in a bowl, in a pasta dish, in a roast chicken or in a cake.

But back to the lemons, I call them baby lemons but in my uneducated citrus-food guess I think they're just dwarf-sized lemons. However, they came unwaxed and bright-yellow for the affordable(!) price of $4.99. I had stumbled on a recipe at formerchef.com for a lemon and lavender cake that I wanted to try really badly and a monstrous bag of lemons seemed like the perfect excuse.


Back home, I also figured out a way to trick Brian into allowing me to have the cake. My first trick was to turn the cake into a non-dairy one by using rice milk instead of the regular dairy version (Aha! I have him trapped, we're both gluttons now). And the second trick was to use this as Mother's Day prototype to dedicate to both our mothers who are stuck in their morbid jobs far away from us. Also, I think I deserve to celebrate mother's day since I believe I have done a pretty decent job "mothering" my very rascally dog for the past two years.


So, here's my take on the lemon and lavender cake by Kristina at formerchef.com. It should serve well at a Mother's Day brunch with some nice finger sandwiches, tea and strawberries with lots of cream! I used light olive oil instead of vegetable oil, unwaxed lemons and organic lavender flowers; suggestions for swaps are listed in the recipe. You can make this one day ahead - seal tightly with a layer of plastic wrap followed by a layer of foil and store in the refrigerator. Remove from the fridge about 90 minutes before serving. It should still be moist and delicious.
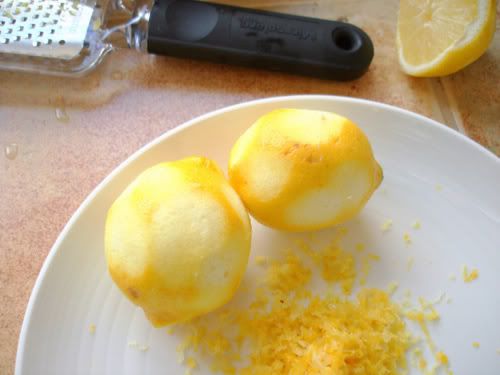
Naked lemons always make me feel sad.

On a side note, I won a Foodbuzz giveaway to Cochon 555 which is an event that has some famous Seattle chefs killing a whole pig and serving it to us. Oh, and there's also wine! I'm excited because I may be able to rediscover my Asian gastronomic roots by noshing on crunchy pig ears. Hurrah!

Lemon and lavender cake
Makes a 7" round cake or 8"x5" loaf

Cake
1.5 cups all purpose flour (200g)
1 cup granulated sugar (100g)
1 tsp baking powder
1/2 tsp salt
1/2 cup rice milk (120ml) (or just use regular milk)
1/2 cup olive oil (120ml) (or swap vegetable oil)
2 eggs
2.5tsp lemon zest
1.5tsp dried lavender flowers

Glaze
1 tbsp granulated sugar
1/3 cup honey (113g)
1 tsp lemon zest
1/4 cup lemon juice

Preheat oven to 350°F. Lightly spray your baking pan with cooking oil or just rub some oil using a paper towel.

In a large bowl, mix together flour, baking powder, sugar and salt. In a smaller bowl, whisk together eggs, milk, oil, lemon zest and lavender flowers. Create a well in the large bowl and pour in the egg mixture. Stir gently until all ingredients are just combined. Pour into prepared baking pan.

Chuck into oven and bake at 350°F for about 40 minutes. Stab it with a small knife and if there are no soft crumbs sticking to the knife, it's done. Otherwise, check at every five minute intervals.

When the cake is done, remove from the oven. Let it cool in the pan and you can start on your glaze. Heat all the ingredients for the glaze in a saucepan until the sugar is dissolved and the glaze is slightly viscous.

Stab your cake all over with a chopstick or a skewer and pour the glaze all over it. Leave it to soak for about 5 minutes, remove from the pan and it's ready.

Sunday, April 25, 2010

How to make Chiu Chow Chili Oil

If you're crazy about spicy foods like I am, you might benefit from making your own chili oil. While regular chili oil is super easy and cheap to make at home, I prefer the more dramatic flavors of Chiu Chow chili oil. It spices up noodle dishes, can be used in stir-fries and is a must in Sichuanese cuisine. The stuff you pick up at the Asian market is usually filled with preservatives, or in the case of Lee Kum Kee, an insane amount of salt (which also acts as a preservative).

Chili oil is basically oil infused with chili to impart that smoky, spicy taste to the oil. Traditional chili oil is filtered to remove the dregs such that the resulting infusion is clear and light. Chiu chow chili oil is slightly different from the traditional chili oil in that it usually contains a mixture of chillies, garlic, soy sauce and sesame oil. You can use both the infused oil and the dregs in cooking. I personally use the oil for stir-frying and the dregs I eat it as a condiment to pho and wonton soup. I have it in my pantry all the time and have basically substituted this for the artificial pastiness of Sriracha.

To avoid botulism and the various incapacitating hazards that go with infusing oils, I strongly suggest using dried ingredients and making sure you avoid getting any of the ingredients or tools wet while you are making this. This recipe is really easy to remember - it uses a 1:3 system. It also keeps for a long time, so you can make a big jar of it and use it for lightning quick chili fixes.


Chiu Chow Chili Oil
Makes about 250g.

1/2 cup peanut oil
1 tablespoon sesame oil

3 tablespoons dried chili flakes
3 tablespoons fried onions, crushed with the back of a spoon into fine crumbles
1 tablespoon dried garlic granules

3 teaspoons salt
1 tablespoon light soy sauce

Heat the peanut oil and sesame oil in a pan over very low heat for about 6 - 7 minutes. Your oil should be hot but not smoking or boiling. You don't want to scorch your chilies.

Assemble all the remaining ingredients in a CLEAN, DRY glass bottle. Pour the hot oil over the chili mixture, mix gently with and let stand until cool. Seal tightly and leave at room temperature for three days. And on the third day, chiu chow chili oil is made! Make sure to use a clean, dry spoon every time you use your chili oil - the chili oil should keep for up to two months at room temperature.

Wednesday, April 21, 2010

Stories from my kitchen, deep in the recesses of the Grad School abyss.

The average graduate student in the United States takes 6.7 years to complete a PhD. I can tell from experience that this is a statistic of high significance. Earning a PhD. (and by earning, I sincerely do mean earning) is one of those things that you enter into thinking you'll be the one heroic person that won't ever be sucked into the black hole of procrastination and despair, and yet as you ever so gracefully fight your way through the torturous mount of journal articles, research assignments and unfortunate talks by dawdling old grandfathers, you feel as if the fight was already lost the moment you applied for graduate school.

I have been so despondent lately with the prospect of dragging this degree out beyond a decade that I have sunk into another unfortunate hole that graduate school digs for you: the hole of prepackaged cookies, microwave meals and tinned soup (horrors!). I sometimes think that cookbooks really should never be called cookbooks because really, in times of crises, they have absolutely nothing to offer! I do not have a single cookery book in my house that offers me advice on what to whip up when I'm tired, cranky and sully at 3am in the morning. I most certainly do not look kindly on Hugh Fearnly-Whittingstall's butchering of a pig to make stew when I'm dying from hunger. I do not want to raid my spice cupboard after a nasty day at work for any of David Tanis' supposedly easy homecooked meals. And so I am resigned to tinned soup and Healthy Choice packet bought in bulk at Costco.

But all is not lost dear reader, for I have decided that while I will be no Thomas Keller, I will also not subscribe to being Julia Dreyfus. I also do not intend on being 20lbs overweight on Pepperidge Farm Milano cookies. Here's a sneak peek on what I will try to make more of on this blog: fast, healthy meals that can be prepared in no time and that taste better than anything your local Target can peddle.

Thick slices of full rye bread with lax & dill

Nicoise salad with smoked salmon

Leftover challah bread turned into french toast

Spanish rice with andouille sausage, spinach and pancetta

Friday, April 2, 2010

A little over three months is a long time to be getting my New Year's Resolution started. In between moving, going on a holiday, a surgery or two, school and general laziness, cooking has taken a backseat. A severe backseat, I might venture to say. I have had the opportunity to savour some of the finest from Safeway's frozen aisles and subsisted on copious amounts of rotisserie chicken and bread. In fact, my wine rack is so miserably barren, I feel an inconsolable amount of sadness.

All these leads me to the question of when will Coolio get his due and have his 76 or so ghetto-fab recipes featured on Konosur? As he would put it, "I've got no friggin' idea, shazam!". I really don't. But what I do now is that I have a pretty decent kitchen right now with a fancy shmazzy gas stove (gas stove!), a convection oven and several really good cookbook I've been dying to get (eg, David Tanis' 'A Platter of Figs' and 'The River Cottage Cookbook').

After a couple of seriously hectic and mind-numbingly dull weeks, we finally got our CSA box in this week. Spring is in transition and the first shipment of strawberries came. I think I might try making some rose-scented strawberries for Easter this weekend. But for now, I've put my aging carrots and bananas to good use for a fine breakfast coffee cake. This is probably nothing new, but it's a great way to use up bits and pieces of leftover carrots and bananas. I made this super easy cake for us , and a carrot/banana puree for the dog. Nothing goes to waste in this house.


Carrot and Banana Loaf Cake
Makes 12 slices

1 cup unbleached AP flour
1 cup whole wheat flour
3/4 cup light brown sugar
2 eggs, lightly beaten
1/4 cup vegetable oil
1/2 cup applesauce
1 cup mashed bananas (about 2 bananas)
1 cup grated carrots (about 2 large carrots)
1/2 tsp cinnamon
1/2 tsp salt
1 tsp baking soda
1/2 cup chopped walnuts or pecans

Preheat oven to 350°F. Lightly grease a 9x5" loaf pan.

Mix together sugar, oil, eggs and applesauce in a bowl. Stir in bananas. Gently fold in flour, cinnamon, salt and baking soda, alternating with the grated carrots. Fold in chopped nuts until just well mixed.

Chuck it into the preheated oven and bake at 350°F for 50 - 60 minutes until the "test"** shows the cake is cooked through. Remove from oven, leave to cool in pan for 10 minutes. Turn out onto wire rack, cool for another 5 minutes, cut and serve!

** Test refers to the thin knife/skewer method, you know what I mean.

Monday, January 18, 2010

A New Year's Roast-olution


2009 went by in such fury I cannot believe it's already mid-January of a new year. I think somewhere along the way - amidst the hustle of grad school, taking care of a crazy dog with thyroid issues, and trying to save a nickel for myriad reasons, I lost the will and drive to cook. Most days at the end of 2009 were spent eating store-bought rotisserie chicken, having canned soup for lunch and gorging on raspberry croissants from The Essential Bakery during tea-time. A combination of these eating methods have not only left me inches bigger but I swear I'm more lethargic, more acne-prone and more

My belated New Year's resolution includes these things that I hope you dear readers will share with me:

1. Cooking all 76 recipes in Cooking with Coolio in 365 days. I received the cookbook for Christmas and have been constantly bemused and somewhat befuddled by the names of recipes (Yappa Dabba Snappa!) and funny descriptions. Fo' shizzle!
2. Cooking on a budget - reading through Coolio's cookbook and having had discussions with some food-discerning friends, I've come to the conclusion that trying to eat well and healthy these days really does cost a lot.
3. Cooking ethically. Speaks for itself.

In the meantime, to start off my resolutions, I went to the Farmer's Market on Saturday and bought a frozen pastured chicken. The fresh chickens were about 50cents/lb more expensive and the very nice lady told me to go for the frozen chicken instead and let it thaw out in the fridge over two days. Since all my herbs died in an early frost (and because I allowed them no water or fertilizer over September), I am using dried herbs for this recipe and it works equally well - particularly since it's winter and when else better than to use dried herbs. I plan to split this meal into four parts for Brian and I; you can be pretty sure we'll be sick of roast chicken by the end of this week. The recipe is an adaptation from Hugh Fearnley-Whittingstall and Giada de Laurentiis' roast chicken recipes, cooked in a cast-iron skillet for ease of preparation and crispy well-done skin. Put that stupid, overprice All-Clad roaster aside and taste the magic of Lodge Logic.

Easy Skillet Roast Chicken
Makes 4 servings and leftovers!

3 lbs. fresh/frozen chicken (preferably organic/pastured)
1 head garlic
1 lemon
1 orange
2 tsp dried marjoram
2 tsp dried oregano
Paprika
Salt
Finely ground pepper
Olive oil

1. Remove your fully thawed chicken from the refrigerator and rinse it gently with cold water.
2. Wipe the inside and outside completely dry with paper towels (remember to compost your paper towels!). You want to make sure the chicken is super dry or else it will steam in the oven and produce wilty-slimy skin. Allow the chicken to sit at room temperature for 15 minutes, covered in paper towels so that the any remaining liquid is soaked up. Salmonella schmonella. Pish.
3. Preheat the oven to 400°F. On a stovetop burner, set your cast-iron pan on medium heat to warm it up. If you're using a roasting pan, chuck it in the oven for a brief while.
4. Rub some salt and pepper into the cavity of your chicken.
5. Smash and peel your garlic bulb, quarter your lemon and orange. Stuff two lemon quarters, two orange quarters and about 3/4 of the garlic cloves into the cavity of the chicken.
5. Sprinkle salt and pepper, oregano, marjoram and paprika over your chicken. Top with a few glugs (as Jamie Oliver will say) of olive oil and rub the spices all over your chicken. It's quite obscene, but your raw chicken will love the massage. Make sure you get all the nooks and cranny and both sides of the chicken.
6. Truss (fancy term for tie) end of chicken drumsticks.
7. Set marinated chicken onto heated cast-iron pan or roasting pan gently and chuck into preheated oven.
8. Roast at 400°F for 40 minutes and 450°F for 15 minutes until a thermometer inserted into thickest part of the thighs is about 160°F.
9. Turn off the oven, leave the door slightly ajar and let the chicken rest for 15 minutes before carving.

Serve with warm potatoes, chicken gravy and tons of wholesome vegetables.

Sunday, August 30, 2009

Midnight Moon Gouda Cheese


[Image from pdphoto.org]
One of my favorite things to do everytime I go to Whole Foods is look and sample at the extensive cheese collection. While the quality of the cheese selection varies from place to place, the Whole Foods I frequent has an INCREDIBLE selection, much more so than any other "pretentious" cheese importers I've been to in Seattle.

Over the past weekend, I picked up an extremely small piece of Midnight Moon Gouda Cheese which is imported by Cypress Grove Creamery in California. It costs $21.99/lb which I guess is one of the more expensive goudas I've seen. But holy lord, it was worth the $7.98 I paid for a wedge smaller than my hand.

The cheese is made from goats milk and aged for 12 months and bursts into a wonderful nutty creaminess in your mouth. There's subtle goat cheese flavors with a mild saltiness that goes so incredibly well with a fruity rose from Spain or even a crisp
French Chardonnay. Grilled peaches rounds with an endive salad rounds off the cheese and wine for a splendid summer supper.

P/S: I wrote this in lieu of actual cooking updates, I think I'm going to do a bit more of wine, cheese and beer updates now since I've been consuming more of these things due to lack of time!

Saturday, August 8, 2009

Rendang Ayam (Chicken Rendang)

Chicken rendang is one of those dishes I grew up eating but never realized how bad it actually is for me. Rendang is basically and Indonesia or Malaysian style curried chicken simmered in coconut milk and dessicated coconut. I remember ladling spoonfuls after spoonfuls of it for my morning "nasi lemak" jaunt.

When I first started cooking chicken rendang, then I realized that unless I wanted to die of a heart attack at 29, I had better cut it out of my diet immediately! I haven't eaten chicken rendang in over a year, and it just seemed an appropriately Malaysian dish to cook for my couples' date night (part of my surburban, growing old ritual). This recipe is something I've spend a long time perfecting, and which I promise you, will be one of the best rendang recipes you'll ever find.

If you can't find screwpine (pandan) leaves in the fresh produce section of an Asian supermarket, try the frozen aisle. If you're in Seattle, Vietwah supermarket down in the ID has it frozen (It's call La Dua in Vietnamese), alongside some frozen banana leaves. I literally had to run to four different stores just to locate pandan leaves and kaffir lime leaves. So if you want to attempt this dish, make sure you have a decent Asian market close to you. You need tons of shallots and lemongrass to ensure that you have a thick gravy instead of a wussy, soupy one.


I also used fresh chillies instead of dry ones - I think dried chillies are much spicier and definitely not as tasty. Jalapenos or habaneros don't really work for this either - instead I used Korean chillies, also known as the Holland varietal which is milder, sweeter and the skin is much smoother and blends easier. If you can't find any Korean chillies, use 2 red Jalapenos and 8 dried chillies, soaked and deseeded.

Chicken Rendang
Makes 6 servings

2 lbs chicken (I used 6 chicken drumsticks and 6 pieces skinless, boneless thighs)

8 fresh red chillies, deseeded and rinsed and cut into 1 inch pieces
15 shallots, peeled and quartered
4 cloves garlic, smashed
1 piece fresh ginger (about 2 inches long), coarsely chopped
2 teaspoon ground turmeric

1/3 cup olive or vegetable oil

4 pieces lemongrass
5 pieces kaffir lime leaves
2 screwpine (pandan) leaves, knotted
1 1/2 cups coconut milk
1 1/2 cups dessicated (shredded) coconut
1 tablespoon brown sugar
1 1/2 teaspoon salt

In a frying pan over low heat, toast the shredded coconut until it becomes a dark golden hue. Set aside to cool. Cut the lemongrass into 3 inch pieces and give each piece a whack with a rolling pin to release the flavors.

Grind the chillies, shallots, ginger, turmeric and garlic in a food processor until fine, but do not puree.

In a large wok or dutch oven, heat the oil over high heat. Add in the grinded chilli mixture and fry for about 15 minutes until the mixture is golden and fragrant.

Add in the chicken and stir fry for an additional 10 minutes, until the chicken turns yellow from the turmeric and is coated through with the chili mixture.

Add in the coconut milk, lemongrass, kaffir lime leaves and pandan leaves. Bring the mixture to a boil, cover and simmer over low heat for about 45 minutes until the chicken is tender and cooked through.

Toss in the toasted, shredded coconut, and stir to mix thoroughly. Allow the rendang to simmer uncovered until the gravy is thick (about 15 minutes). Add in salt and sugar, stir and turn the heat off.

Remove the lemongrass, kaffir lime leaves and screwpine leaves and serve the chicken rendang with rice, bread or "nasi lemak"!

Wednesday, August 5, 2009

Japanese food made easy

Oh, dear. I've become one of those bloggers that never update. And I apologize sincerely - I've been busy with work, fretting over work and have generally just not been in the mood to do much cooking (or posting about it). I made a fantastic meatloaf the other day though (if I may brag), and will put up the recipe when I eventually have the time but in a brief respite, I thought it would be nice to showcase the kind of meals I've been having - quick and really just not much to it.

We went over to the International District to find some ingredients for a chicken rendang recipe I wanted to make over the weekend. We ended up picking up some sashimi grade salmon for an easy Japanese dinner. Add some avocado, Calrose rice and tobikko and you have a nice donburi. The CSA brought over some sugar snap peas and green beans and I followed a really great recipe by Giada De Laurentiis to make a light and refreshing "Anytime Vegetable Salad".

Have a great week! Chicken rendang recipe is promised soon.

Tuesday, July 21, 2009

Mediterranean Quinoa Salad

Oh my goodness. As I type this, I am sitting in a sweltering room, leaking sweat from the back of my chubby knees and wondering why the hell it hasn't rained in seven days. I know I moan and groan a lot during winter when it actually does rain, but it is really too bloody hot. Global warming, damn you.

When it's this hot out, I don't really enjoy being outside at all, so I usually just sit indoors and stare at the fan with a tall pitcher of iced tea and do nothing. But of course, my tummy gets all rumbly because I'm a greedy person, so I have to get up grudgingly and make some food.

Usually all I really crave in this weather is some lovely pinot grigio and prosciutto wrapped melon slices. But today I discovered I had some lovely wild king salmon fillets in the freezer and thought a Mediterranean style salad with some cooling cucumbers would make a lovely supper. The CSA also brought along some really beautiful heirloom cherry tomatoes that were just so cute and tasty (always seems wrong to put tasty and cute in the same sentence)!

This recipe is my take on the classic Mediterranean couscous salad, except that it uses quinoa and white wine vinegar. Quinoa is much better for you and works as a one dish meal in almost anything since it contains both carbs and protein. This recipe also makes about enough servings to last you through the week, so you can just be lazy and lie in a bath of ice cubes instead.

Mediterranean Quinoa Salad
Makes about 8 servings

1 cup quinoa, cooked according to package directions, cooled and fluffed *see note
2 medium English cucumbers, seeded and diced into 1/2 inch cubes
1.5 pint cherry, grape or heirloom cherry tomatoes
10 large Italian basil leaves (or about 20 smaller ones), julienned
10 large mint leaves (or about 20 smaller ones), julienned

For the vinaigrette

1/4 cup white wine vinegar
1/2 cup extra virgin olive oil
3 cloves garlic, minced
1 small shallot, minced
1 teaspoon dried oregano
1/2 teaspoon sea salt
Freshly ground black pepper

Combine quinoa, vegetables, mint and basil in a large bowl. In a small bowl, whisk together the ingredients for the vinaigrette and add in to the quinoa salad. Toss well to combine. Serve with salmon fillets or tuna kebabs or sprinkle feta cheese over and eat as is!

*Note: To make perfect quinoa for a salad so that it doesn't turn out too mushy, always wash your quinoa well, strain and use 1 1/4 cup water to 1 cup quinoa. Once your quinoa is cooked, allow it to steam, covered for an additional 5 minutes.

Friday, July 3, 2009

Cultured Butter OMGOMGOMG

For some reason, I've never figured out why eating bread and butter in France always tastes better than eating it in any French Boulangerie in the United States (not to mention French cafes here are not really French cafes but silly pretentious frou frou ones). Butter here always tastes flat and greasy and kind of I don't know, bland? Call me ignorant or unfortunately unaware, but I recently discover the miracle of cultured butter - which I can make at home and it tastes like I bought it for $15 a pound at Whole Paythroughmyarse.

Anyway, cultured butter omgomgomg. Yes, it makes me that giddy. OMG! I found the method for making cultured butter on The Traveler's Lunchbox and well, OMG!

Cultured butter is a breeze to make, and costs half the price of something from Vermont Butter and Cheese Company or imported butter. All you need is a pint of the BEST heavy cream you can find, with the highest butterfat content and is not ultra-pasteurized, some creme fraiche and a lot of patience!

This butter goes absolutely FANTASTIC with crusty slices of baguette (as I'm typing, the roof of my mouth is bleeding from the whole loaf of baguette I just inhaled). I'm glad there are at least some decent baguettes here in Seattle, and with this cultured butter and a nice strong cup of cafe au lait, it's almost like I'm in Paris.

Cultured Butter (adapted from The Traveler's Lunchbox)

*Note: You can change the amount of cream used to yield more or less butter. One pint of cream will yield about 1 stick of butter and 1 cup of buttermilk. For each pint of heavy cream, use 2 tablespoons creme fraiche.

1 pint heavy cream (I used one with 40% butterfat, pasteurized)
2 tablespoons creme fraiche (see note above)
A big bowl of iced water
Fine mesh strainer

In a clean glass bowl, combine the heavy cream and creme fraiche. Stir lightly with a wooden spoon an cover with a clean dish towel. Place the covered bowl in a warm place, ideally the air temperature should be about 75°F (I put mine in the oven overnight). Leave it for 12 - to 24 hours.

After that period, the cream should look a little thicker and you can test with a clean spoon to see if has become tangier. If the cream is gassy and bubbly, you will want to toss it away and start over. It has always work for me within 12 - 14 hour period. Melissa from The Travelers Lunchbox suggests that the ideal temperature for churning is 60°F but I've discovered that at such a temperature, my butter takes forever to come together. So I take it straight from the oven and start churning using a handheld mixer on medium speed. It usually comes together within 20 minutes.

Churning may get a little messy, so you want to don an apron and use a really deep bowl. I used a handheld mixer on Speed-3. The first thing that will form when you beat the cream is whipped cream, which is thick and white. If you keep on beating, little yellow bits will start to curdle, and you know you have your butter. Bring the speed down to low and beat a while longer until the liquid is clear white (buttermilk) and your butterfat has come together.

Strain the buttermilk into a bowl and you can keep this for pancakes or muffins. Pour a cup of ice water over the butter and knead the butter with a fork. Discard the water when it becomes cloudy. Do this multiple times until your water is clear. Your butter will now be in a ball, and will be quite tough. At this point, you want may want to add a bit of sea salt to flavour your butter and give a final knead to release most of the water.

Put your butter on a piece of paper towel and squeeze to release any remaining water. You may want to do this a few times to ensure that your pat of butter is dry.

And voila! You now have salted, cultured butter! I wrapped mine in wax paper and put it in a Ziploc bag - if it is salted, it should last up to a month (if you don't finish it within two days with a loaf of baguette).

With the buttermilk, here's what I made:

Tuesday, June 9, 2009

Spinach and basil pesto

I know what you're thinking: There must be something fundamentally wrong with this girl - she's like a carb factory and damn it, pasta again?

I think I have a right to defend myself here. Our CSA has been bringing a big load of spinach for a couple of weeks now, and as much as I love spinach, I don't eat it as fast as Popeye himself and always find myself throwing it out when the spinach turns to mulch in the refrigerator. The best way to preserve veges is of course freezing them or in my case, add a whole lot of nuts and cheese and turn them into pesto.

There are also a couple of things I tend to splurge on: extra virgin olive oil, Parmigiano-Reggiano (and I'm as pretentious as to say, not parmesan, pish!), good-quality pasta (not that Safeway mush), coffee, wine and beer. Oh and bread too.

So when it comes down to it, the best dinner I can make is a bowl of pasta topped with Parmigiano and a glass of wine!

This pesto will keep in for about a week in a tightly sealed container in the fridge. The best way to serve this is to dump two heap tablespoons over steaming hot flat pasta, and toss with some freshly cracked black pepper, a few cherry tomatoes and a smidgen of crumbled goat cheese. Heaven! (And in heaven, you get to eat this with a glass dry Côtes du Rhône rose out on a sunny deck).
(Mr. Basil Plant - purveyor of fine frontyard basil leaves)

P/S: Use the best ingredients you can find, it makes a world of difference.

Spinach and Basil pesto

Makes 2 cups pesto

2 cups fresh organic spinach (hard stems removed and roughly chopped)
1 cup sweet basil (stems removed)
1/2 cup grated Parmigiano
1/4 cup toasted pine nuts
2 cloves garlic, quartered
1/2 cup extra virgin olive oil
Salt to taste

Chuck everything except the olive oil slowly oil and salt in a food processor and pulse until it becomes a paste. Add in the olive oil slowly and pulse just to combine, about 3 or 4 times.
Stir in the salt to taste and you're all set.